When it comes to growing anything, it’s all about water. You want to catch every drop of it. Moisture in the soil builds organic matter and fertility, which equals naturally healthy plants. Regardless of what you intend to grow, shaping your landscape to harvest the water is step #1.
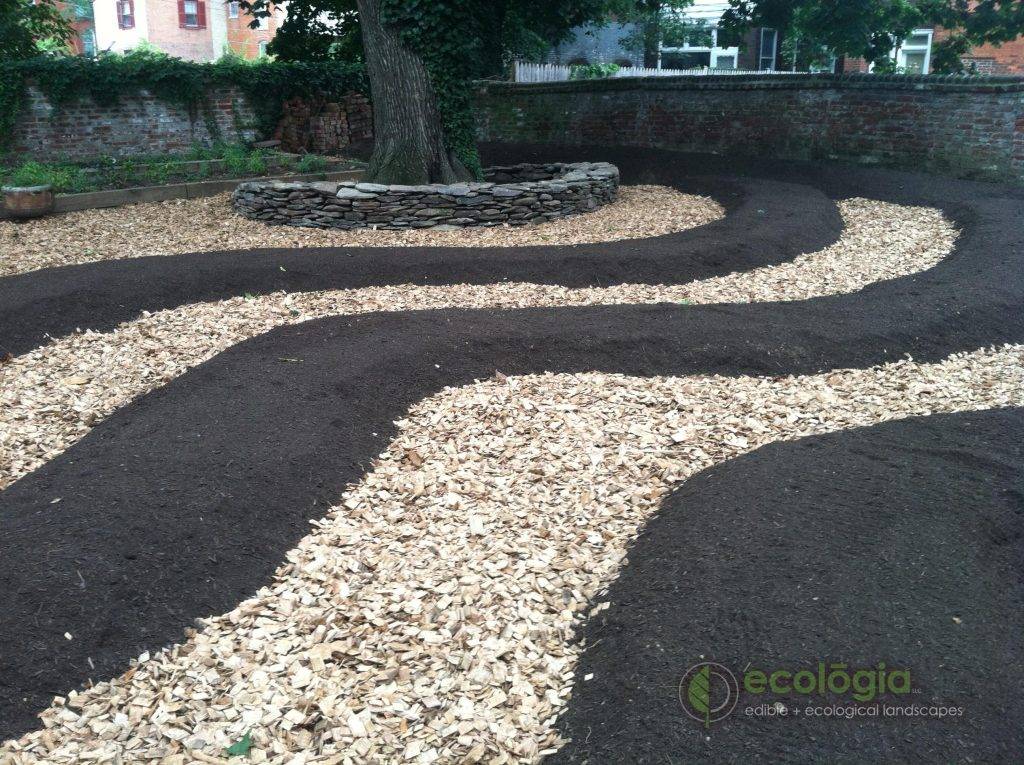
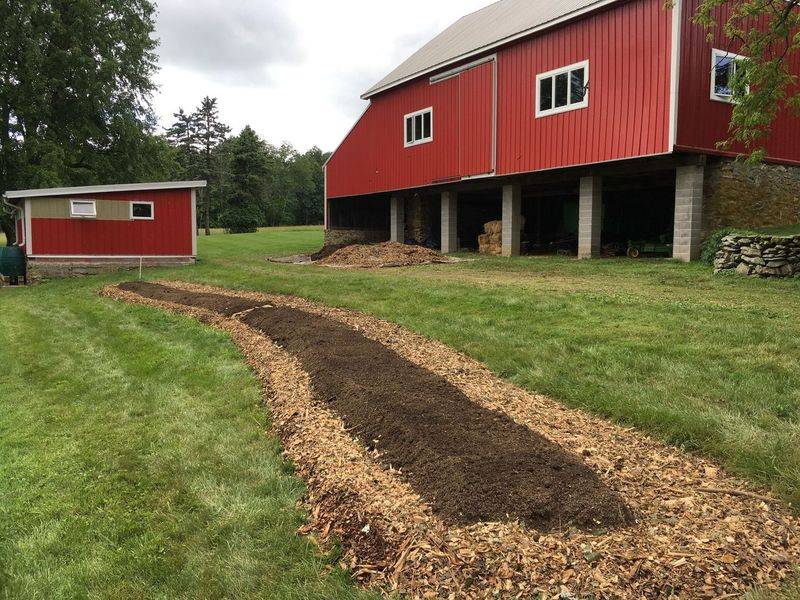
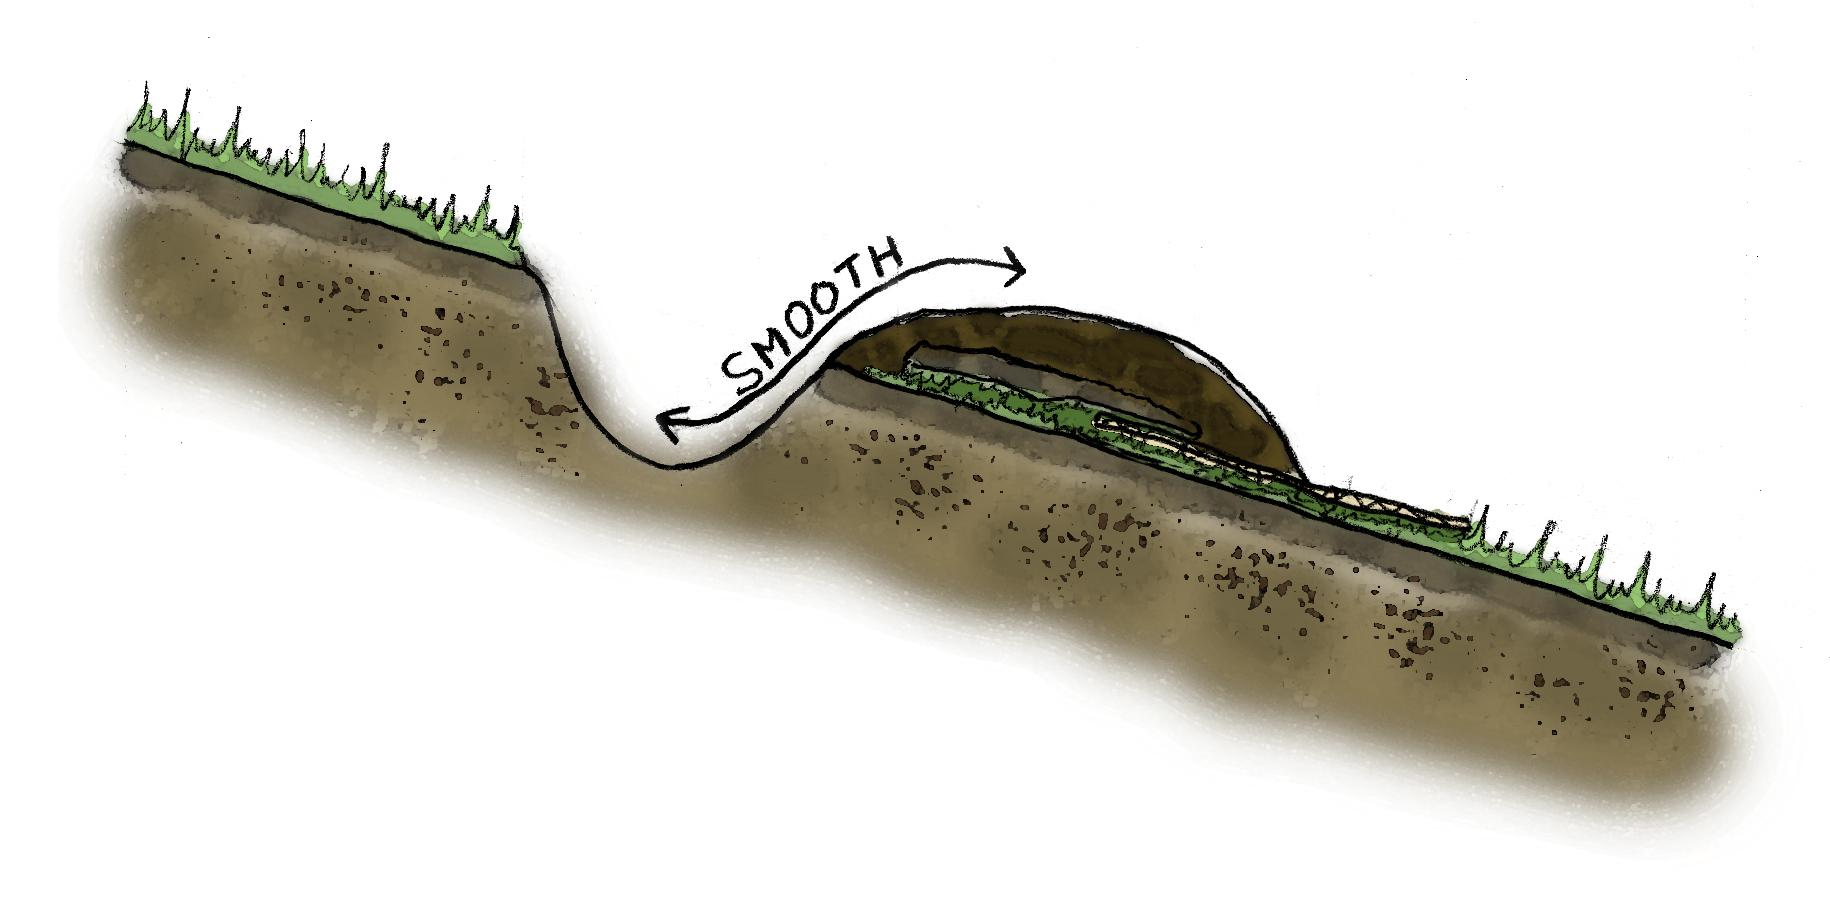
Raised beds on contour not only look beautiful and curvy on your landscape, but also hold and sink the rain. A bed on contour is perfectly perpendicular to the slope, and each point along it is the same level. Unlike conventional swales, which are set off contour to push water away, swales on contour do the opposite by slowing and infiltrating the water right where it is needed most: your garden.
Raised beds shaped on contour, also known as swales, sculpt your landscape in beautiful patterns that clearly define path and bed. Clearly defined raised beds and pathways help avoid soil compaction, allowing the soil to act as a living sponge and loose medium for plant roots. Starting your garden out with raised beds goes a far way to assure your planting success. Contrary to modern landscape design that does its best to get rid of water as quickly as possible, we want to look at our homescape as a mini watershed where every drop of water will be balanced. This goes for all of that overflow coming in from the neighbors too; that problem is about to become a solution.
Swales go just about anywhere they are needed, as long as the slope does not exceed a 3:1 ratio, meaning not more than 1 foot of drop over a 3 foot run. Any steeper than this and you risk blowout from too much water buildup, overflow, and soil destabilization(unless you can start towards the top of the slope). Terraces are recommended for steep slopes and act in a similar way as the swales in harvesting the water on created level ground.
Where you begin and end your raised bed on contour is up to you; there are no magic set points where you are supposed to start or finish. Raised beds on contour are often sited based on the restrictions of the surrounding landscape; i.e., walkway, property edge, drive, or fencing. They can be four feet long or extend all the way across your acreage. Always plan for an overflow. If your swale is hit with a crazy storm surge or will be receiving a high volume of water, plan how to direct and catch the overflow. I place overflows where I will want a pathway across the top of the bed.
So, how does it happen? excerpts from Edible Landscaping with a Permaculture Twist
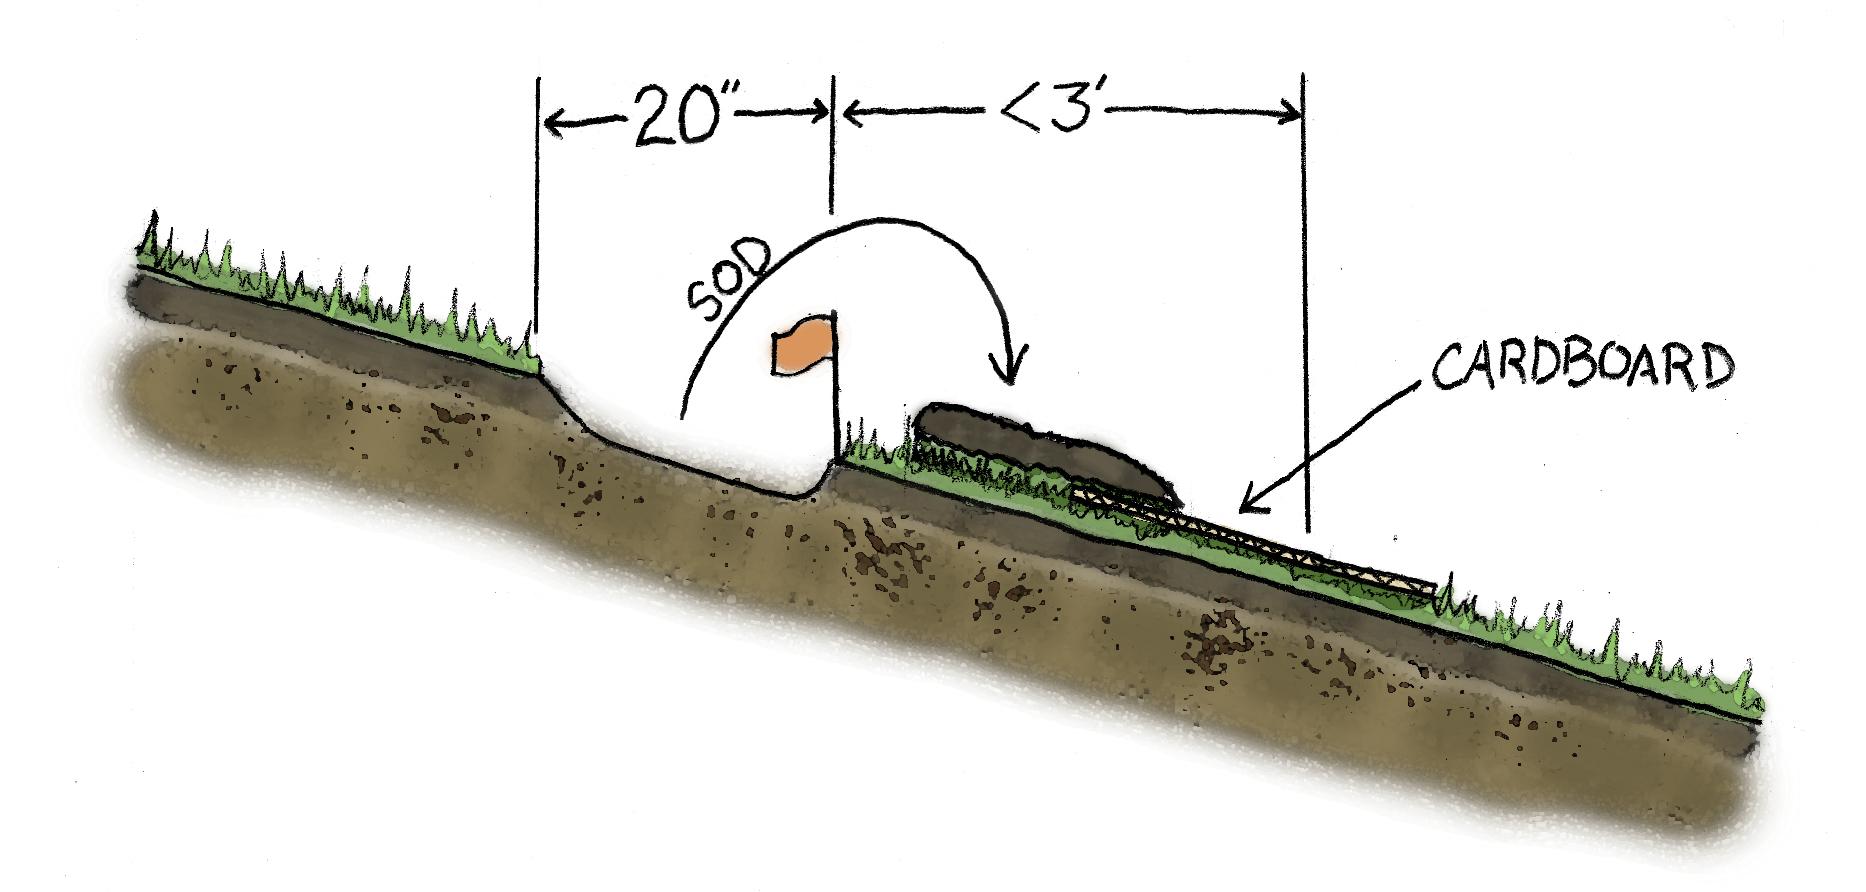
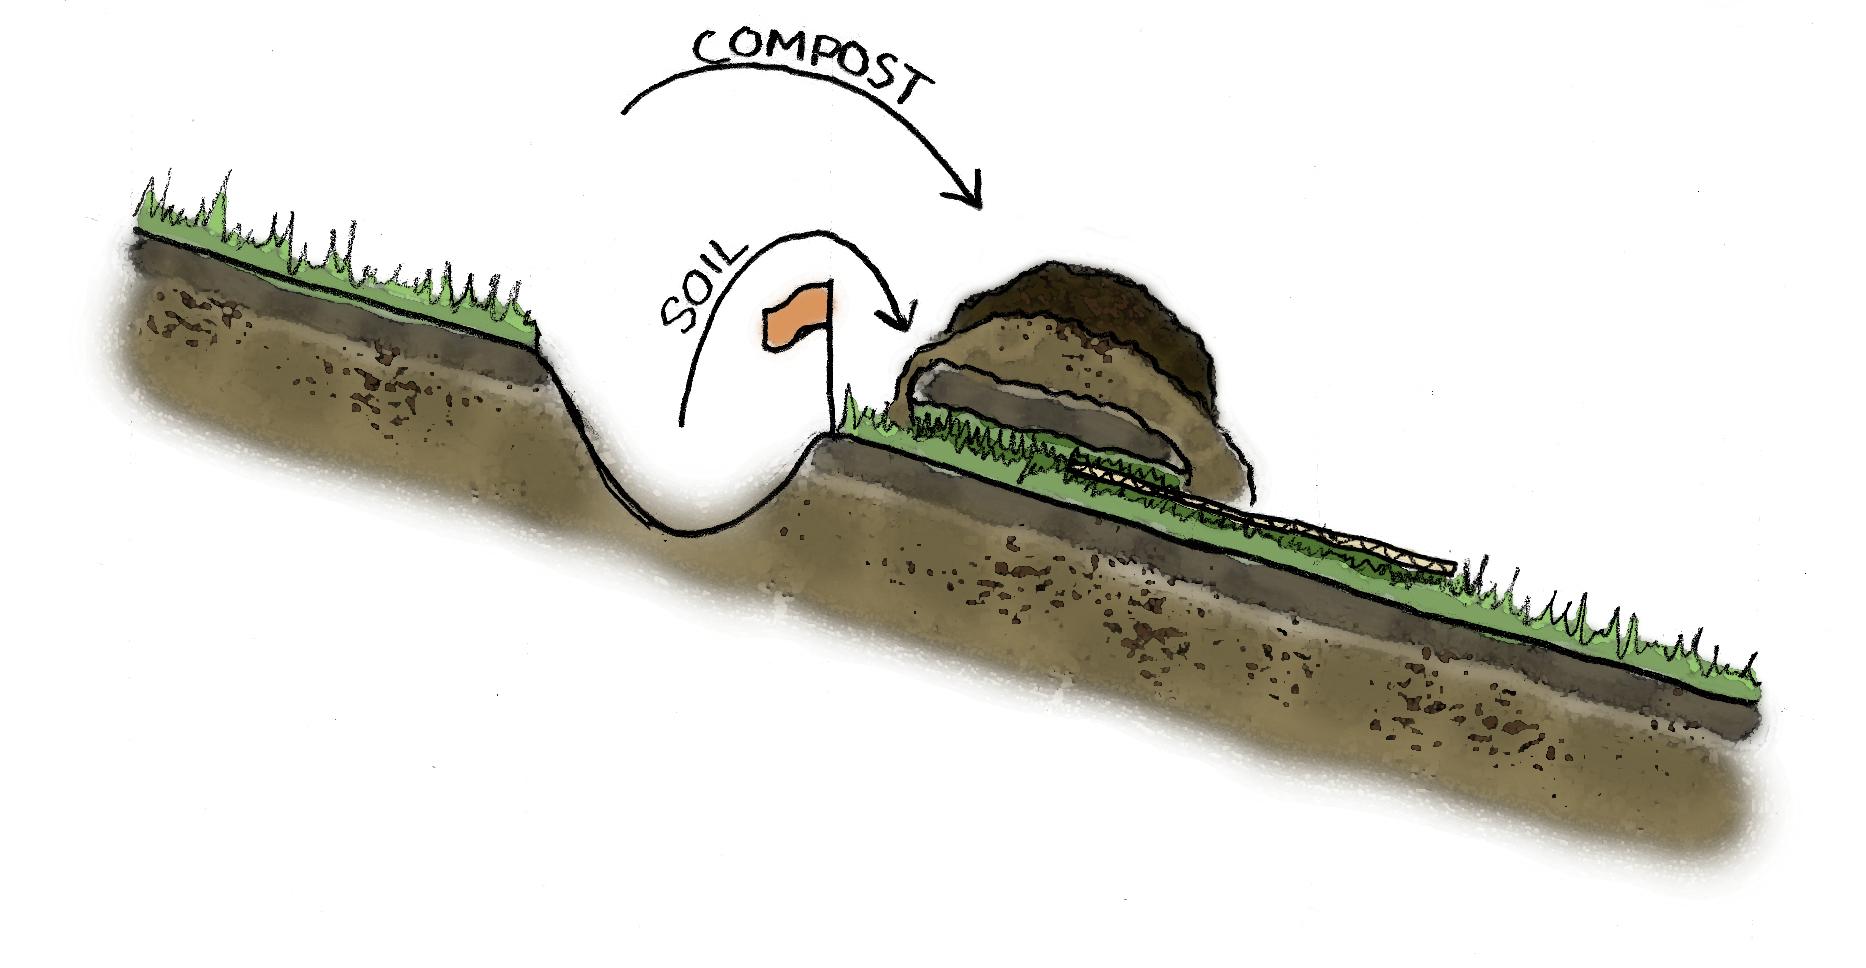
Dig out the sod and flip the grass chunks upside down on the downslope, no further than 3 feet away. The flipped chunks of sod become the first layer in the forming berm. As you keep digging out the basin, throw the earth on top of the inverted sod.
The pile of sod and soil you have roughly piled up now needs some amending and Zen-shaping. Mix in compost at a 3:1 ratio of soil to compost (or two-thirds soil to one-third compost). Intimately mix the compost with the loose soil trying to avoid bringing up the chunks of sod. This is a jump start to feeding your soil and creating a nice planting bed. Once mixed in, it’s time to shape it up.
The Permaculture Manual by Bill Mollison & David Holmgren is the bible on overall permaculture design but also detailed in earth works, swales, rain gardens etc.
* Full details on finding contour and exact measurements, materials and quantities in “Edible Landscaping with a Permaculture Twist”
Resources
Brad Lancaster’s “Rain water Harvesting for Dry Lands and Beyond” volumes 1 & 2 are fantastically written and illustrated. Volume 2 is the real nitty gritty on swale and rain garden design and building.
Posted In: Edible and Ecological Landscape Design

