
Fruit trees that have been potted or transplanted often need continued care and support in balancing their form, especially for good fruit production. Fortunately, pruning is far more simple than most folks think, especially when started with early shaping. Rather than give an academic account of the various pruning styles and approaches, I hope to impart here a sense of what to do as you approach your tree or bush and how to arm yourself with the proper pruning gear.
Pruning and Shaping
The term “Shaping” is used when talking about directing the plant’s form, usually when young. “Pruning” refers to thinning and opening up a mature tree or bush. The two terms often overlap.
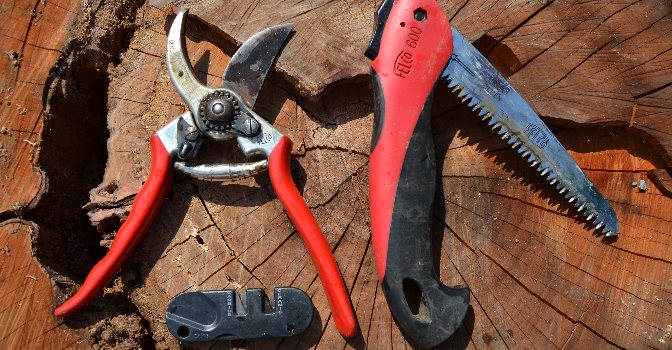
The first thing to do is acquire the right tools, and assure that they are properly sharpened. Please do not grab those old, dull loppers hiding in your shed, intending to prune anything beloved. For most pruning and shaping needs I use only two tools; a hand pruner and a folding pruning saw. I also keep a pocket sharpener on hand to keep the blades of the hand pruner sharp, assuring clean cuts.

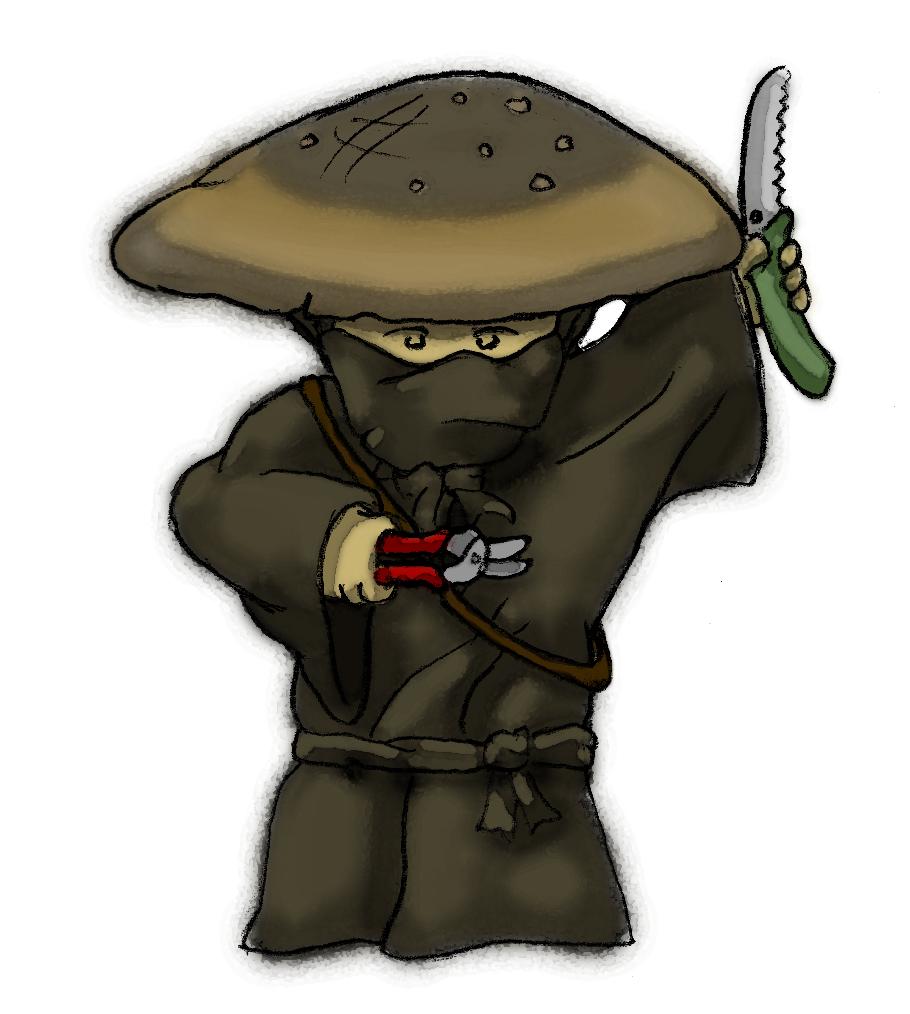
Los Tres Amigos de pruning
Hand pruners are ideal for cutting anything smaller than the size of your index finger. Just about any hand pruner you purchase will do the job, as long as they are “bypass,” meaning the two blades work like scissors. I also recommend using the little holster most pruners come with that clips to the belt or waist band leaving your hands free between cuts. To sharpen the hand pruner blades, I use a nifty little gadget by Smith’s Sharpeners that sharpens pruners up in a jiffy.
The folding pruning saw works for cutting branches up to 6 inches thick and efficiently replacing loppers. Beyond that, consider busting out the chainsaw. Any folding pruning saw you purchase will do, as long as the blade can be replaced easily, since they cannot be sharpened. Felco makes good pruning tools and replacement blades.
Learn more about easy to grow fruits for the Mid-Atlantic and beyond.
Approaching the Tree
Where shaping and pruning is involved, there is an old adage that states, “A bird should be able to fly through the tree.” If you make this your mantra, pruning is going to be a breeze. The saying is designed to teach two of the most important concepts of healthy fruit tree shaping: air flow and light. Air flow allows the tree or bush to “breathe” and reduces the dank, stagnant conditions that funky fungi, bacteria, and viruses thrive in. Allowing proper light through the tree also reduces these conditions, while supporting the development of fruit buds, which are most often found on the inside branches.
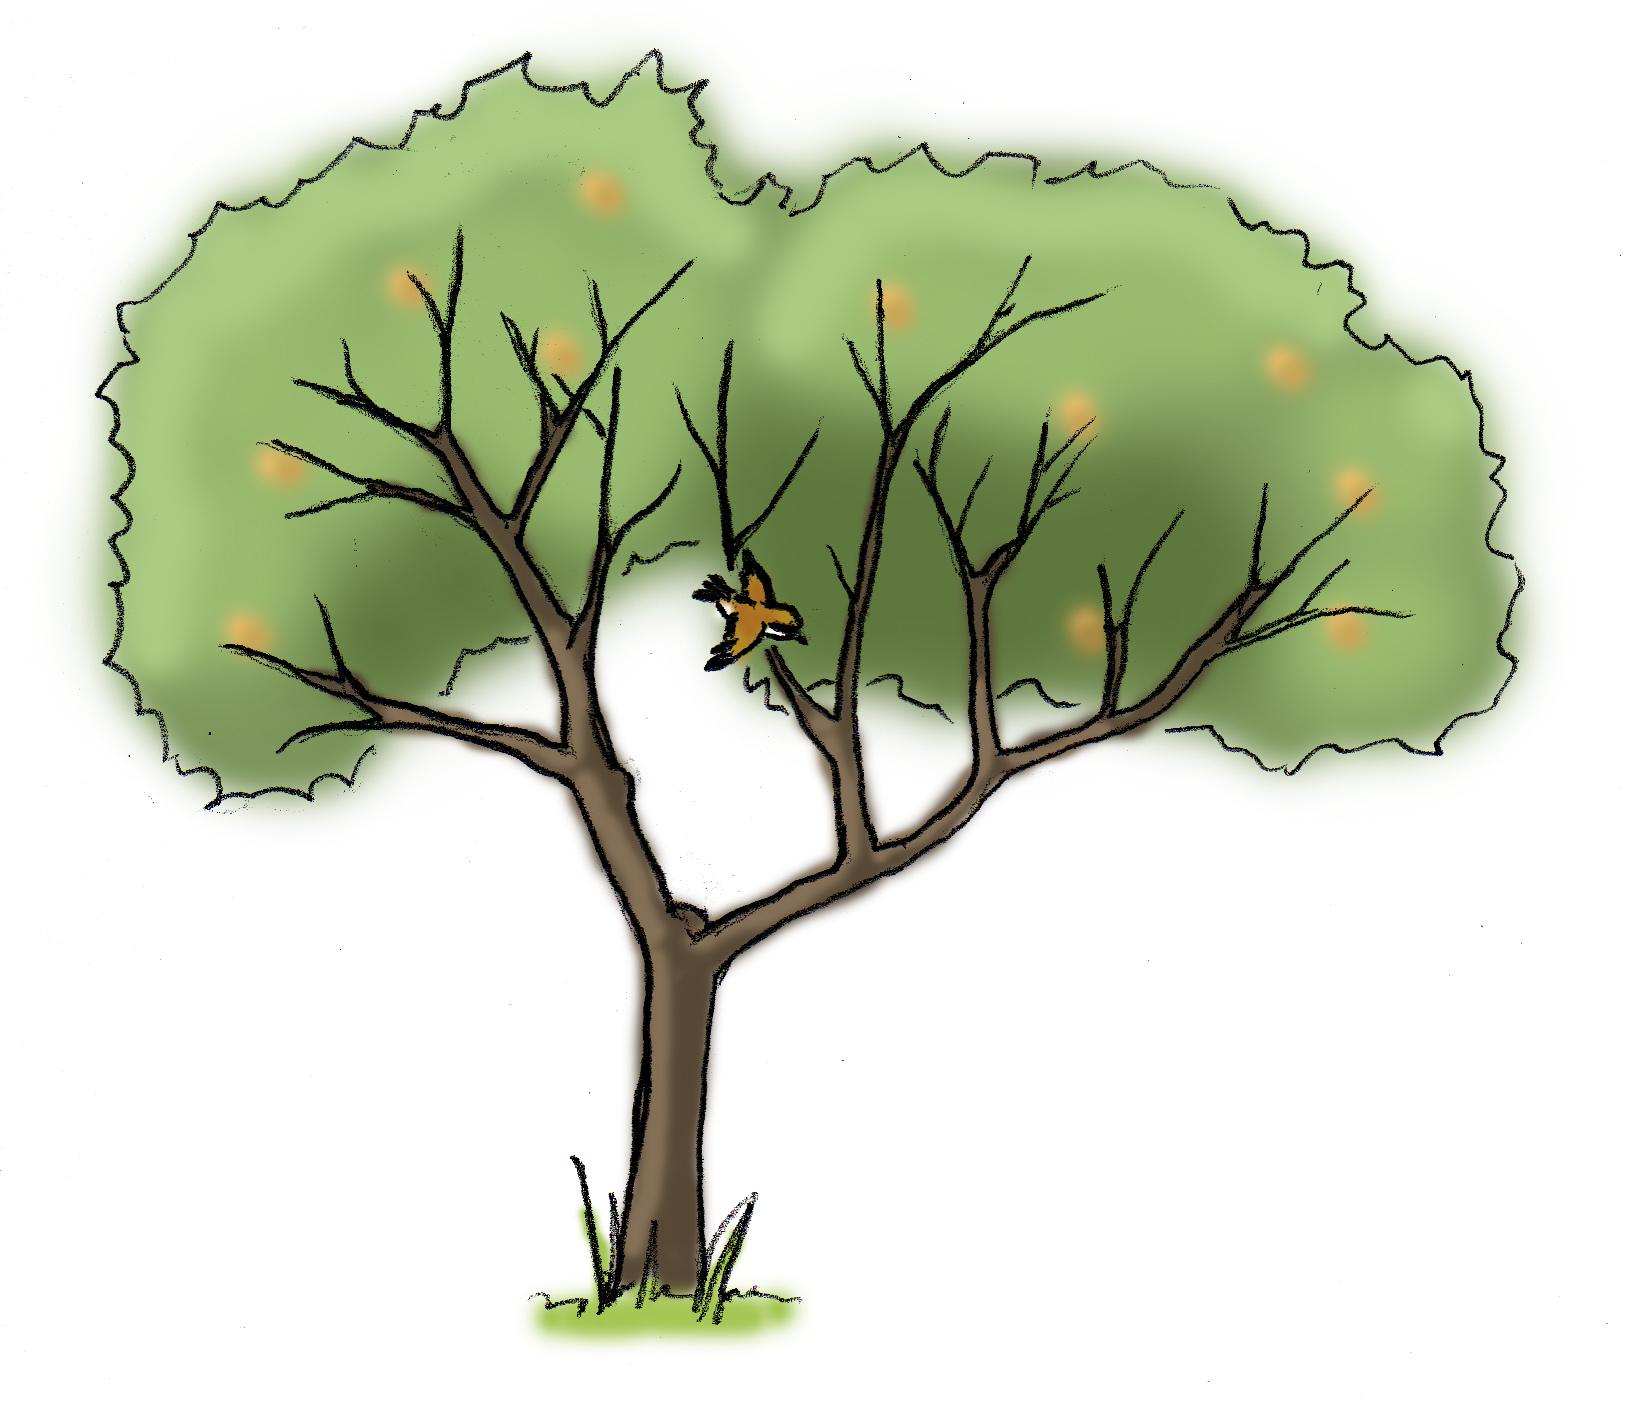
Keep the tree open for air and light flow
What to Cut
When deciding which branches to cut, it is important to first stand back and observe the tree. To begin:
1. Prune out any branches that are growing across or rubbing against other branches.
2. Prune branches that are growing downward or toward the center of the tree.
3. Prune out any branches that appear diseased or broken.
4. Prune out competing central leaders and sprouts that are clogging the tree’s center.
How to Cut
How the branches are cut is simple but important to do correctly to maintain the overall health of the tree. The main rule is to never make the cut so close that the trunk is damaged or so far away you leave a big nub that rots.
1. Cut branches at their collar. When pruning a small branch make a clean cut 1” from the body of the tree at a slight angle away from the trunk (approximately 30 degrees). Cut branches at their collar.
2. Remove the branches weight before making the final cut. For large branches make a cut on the underside forward from the final top cut and remove bulk of branch and weight. Lastly make a third cut to cleanly remove the stub. This will prevent the bark from stripping downward on the trunk.
3. Use thinning cuts all the way back at the branch base. A heading cut farther out on the branch creates a hedging effect and further clogs the tree.
When to Cut
Remember that pruning trees, or shaping, is best done in the late winter before sap rises. Prune water shoots and shoots from the trunk base throughout the year.
Shaping the Young
If you are starting out with a young tree that is one to two years old, you can shape its life-long structure with just a few snips. Most all bare root trees ordered from catalogs arrive at about two years old and 3 to 4 feet tall. Trees sometimes arrive as “whips,” which mean they have no branches. However, most often they already have two or three small side branches, which you may or may not choose to keep depending on their orientation. Though these little branches look insignificant, they will eventually become thick branches that will be the main frame of the tree. These main frame branches are called the tree’s ‘scaffold,’ and that’s what we want to shape.
Whether you start with a bare root tree or a more developed tree they usually come with a few existing branches, often coming off the trunk at 2 or 3 feet high. If there are three or four branches well-spaced around the tree at the same height, you are set. If you have more than four branches at the same height, prune the extras so that the remaining three or four branches are well spaced in opposite directions, like the four points of a compass. It’s helpful to lean over the tree and look down at the branches like hands on a clock to best see their radial spread.
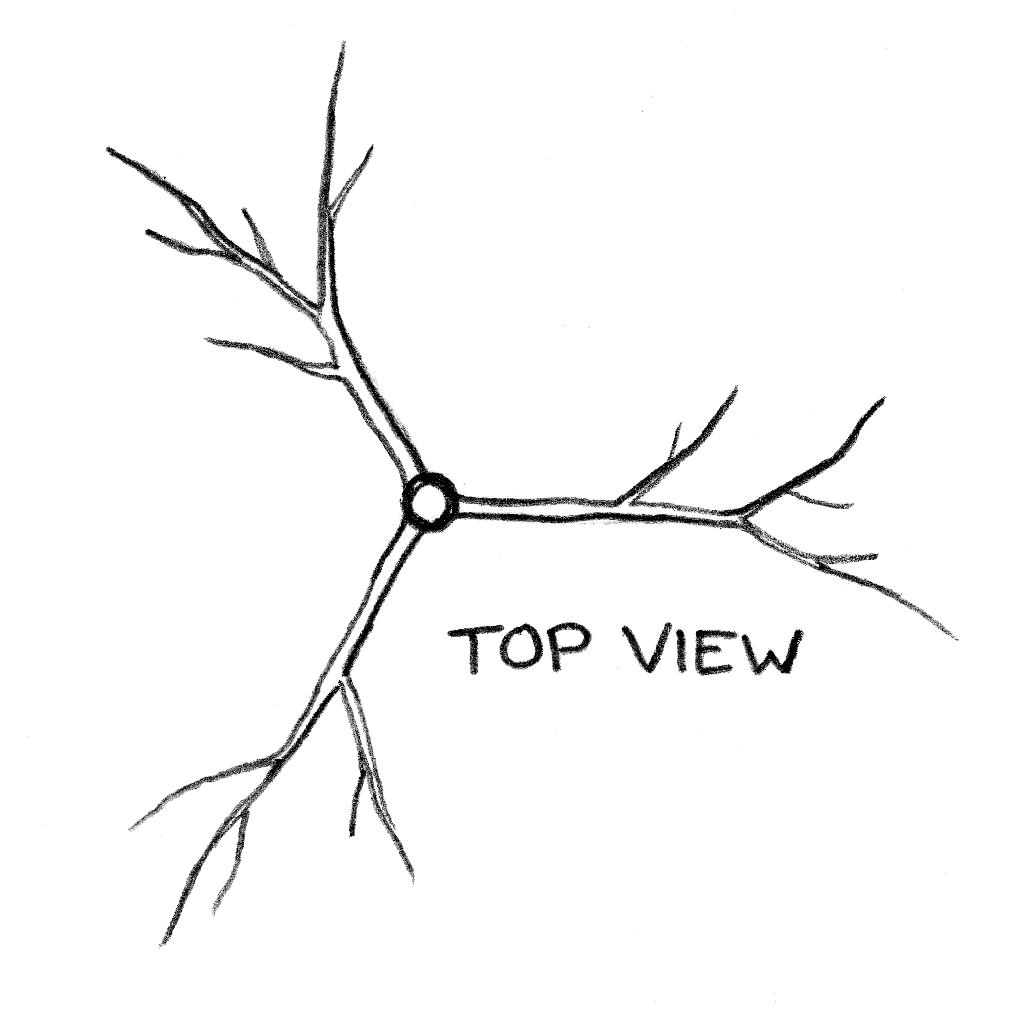
Depending on the type of tree, you may only want to keep these three or four spread scaffolds and discourage any further vertical growth on the truck. This training is called the open vase and resembles an inverted umbrella. Or, you can allow the trunk to continue up and branch again in another well-spaced orientation of three or four branches; this shaping is called a central leader. Do not fret over which is best but rather how you would like the tree to grow in your landscape. The concepts for both styles focus on opening the tree for air and light flow.
Note: If you are individually fencing your trees due to deer browsing, snip the side branches off clean at the trunk and allow the leader to grow up higher. When it reaches about 5 feet high, snip it above a bud to force branching at that height, then select three or four well-spaced branches. This does make your fruit higher to reach but allows strong, healthy branches to form instead of bent and crippled ones caught in the fencing.
The Older Tree
The mature fruit tree that has never been pruned or shaped is usually a wild jungle of branches: branches crisscrossing crowded in the middle, angled downward, broken, and hanging. This is where you usually stand staring in wonder at where to begin.
Though the temptation to whip the tree into shape all at one time is hard to resist, it is best to pace its return to glory gradually by removing a maximum of 25 percent of the tree’s mass each year. An unruly, full-sized tree can take up to three years to work back into shape and health.
Note: Many fruit trees, especially apples, respond to intense pruning by sending up water sprouts, which are soft vertical shoots. These should be pinched or nipped off throughout the growing season; otherwise, they will thicken and become unwanted branches.
To keep in mind:
- Do not fertilize during the years of intense pruning, as pruning already stimulates new growth.
- Combining pruning with sheet mulching out to the drip edge (where the branches reach) will double the tree’s response time and return to health. See the Food Forest chapter for sheet mulching instructions.
- Heavy pruning can reduce or eliminate harvests for the year but will eventually help the tree regulate its bearing to produce fruit every year.
Pruning Gooseberries & Currants
It’s important to remember that gooseberries and currants produce fruit on one, two, and three year-old wood.
- Prune gooseberries and currants when the plants are dormant in late winter or early spring.
- After the first year of growth, remove all but 7 or 8 of the most vigorous shoots.
- At the end of the second growing season, leave the 4 best one-year-old shoots and up to 4 two-year-old canes.
- At the end of the third year, prune so that approximately 4 canes of each age remain.
- Fourth year and onward, the oldest set of canes should be pruned, allowing the new canes to grow.
- Always remove any diseased or broken branches and any that lie along the ground.
This rhythm of pruning ensures that the plants remain productive. A strong, healthy, mature plant should have about 8 to 10 bearing canes, with younger canes eventually cycling out the oldest. This not only optimizes fruit production but keeps the bush ‘breathing’ and helps prevents fungal disease.
Winter Tree Care
Heavily pruned trees and young tree trunks are sensitive to summer sunburn and winter sun scald respectively. To protect recently exposed branches and young trunks I use and recommend a homemade reflective “tree paint”. The Cornell Extension agent who taught me about pruning temperate trees said to simply mix a 1:1 ratio of water and indoor white latex paint. Since this is basically a lime wash, the latex could be traded out with a hydrated lime powder or a milk-based paint.
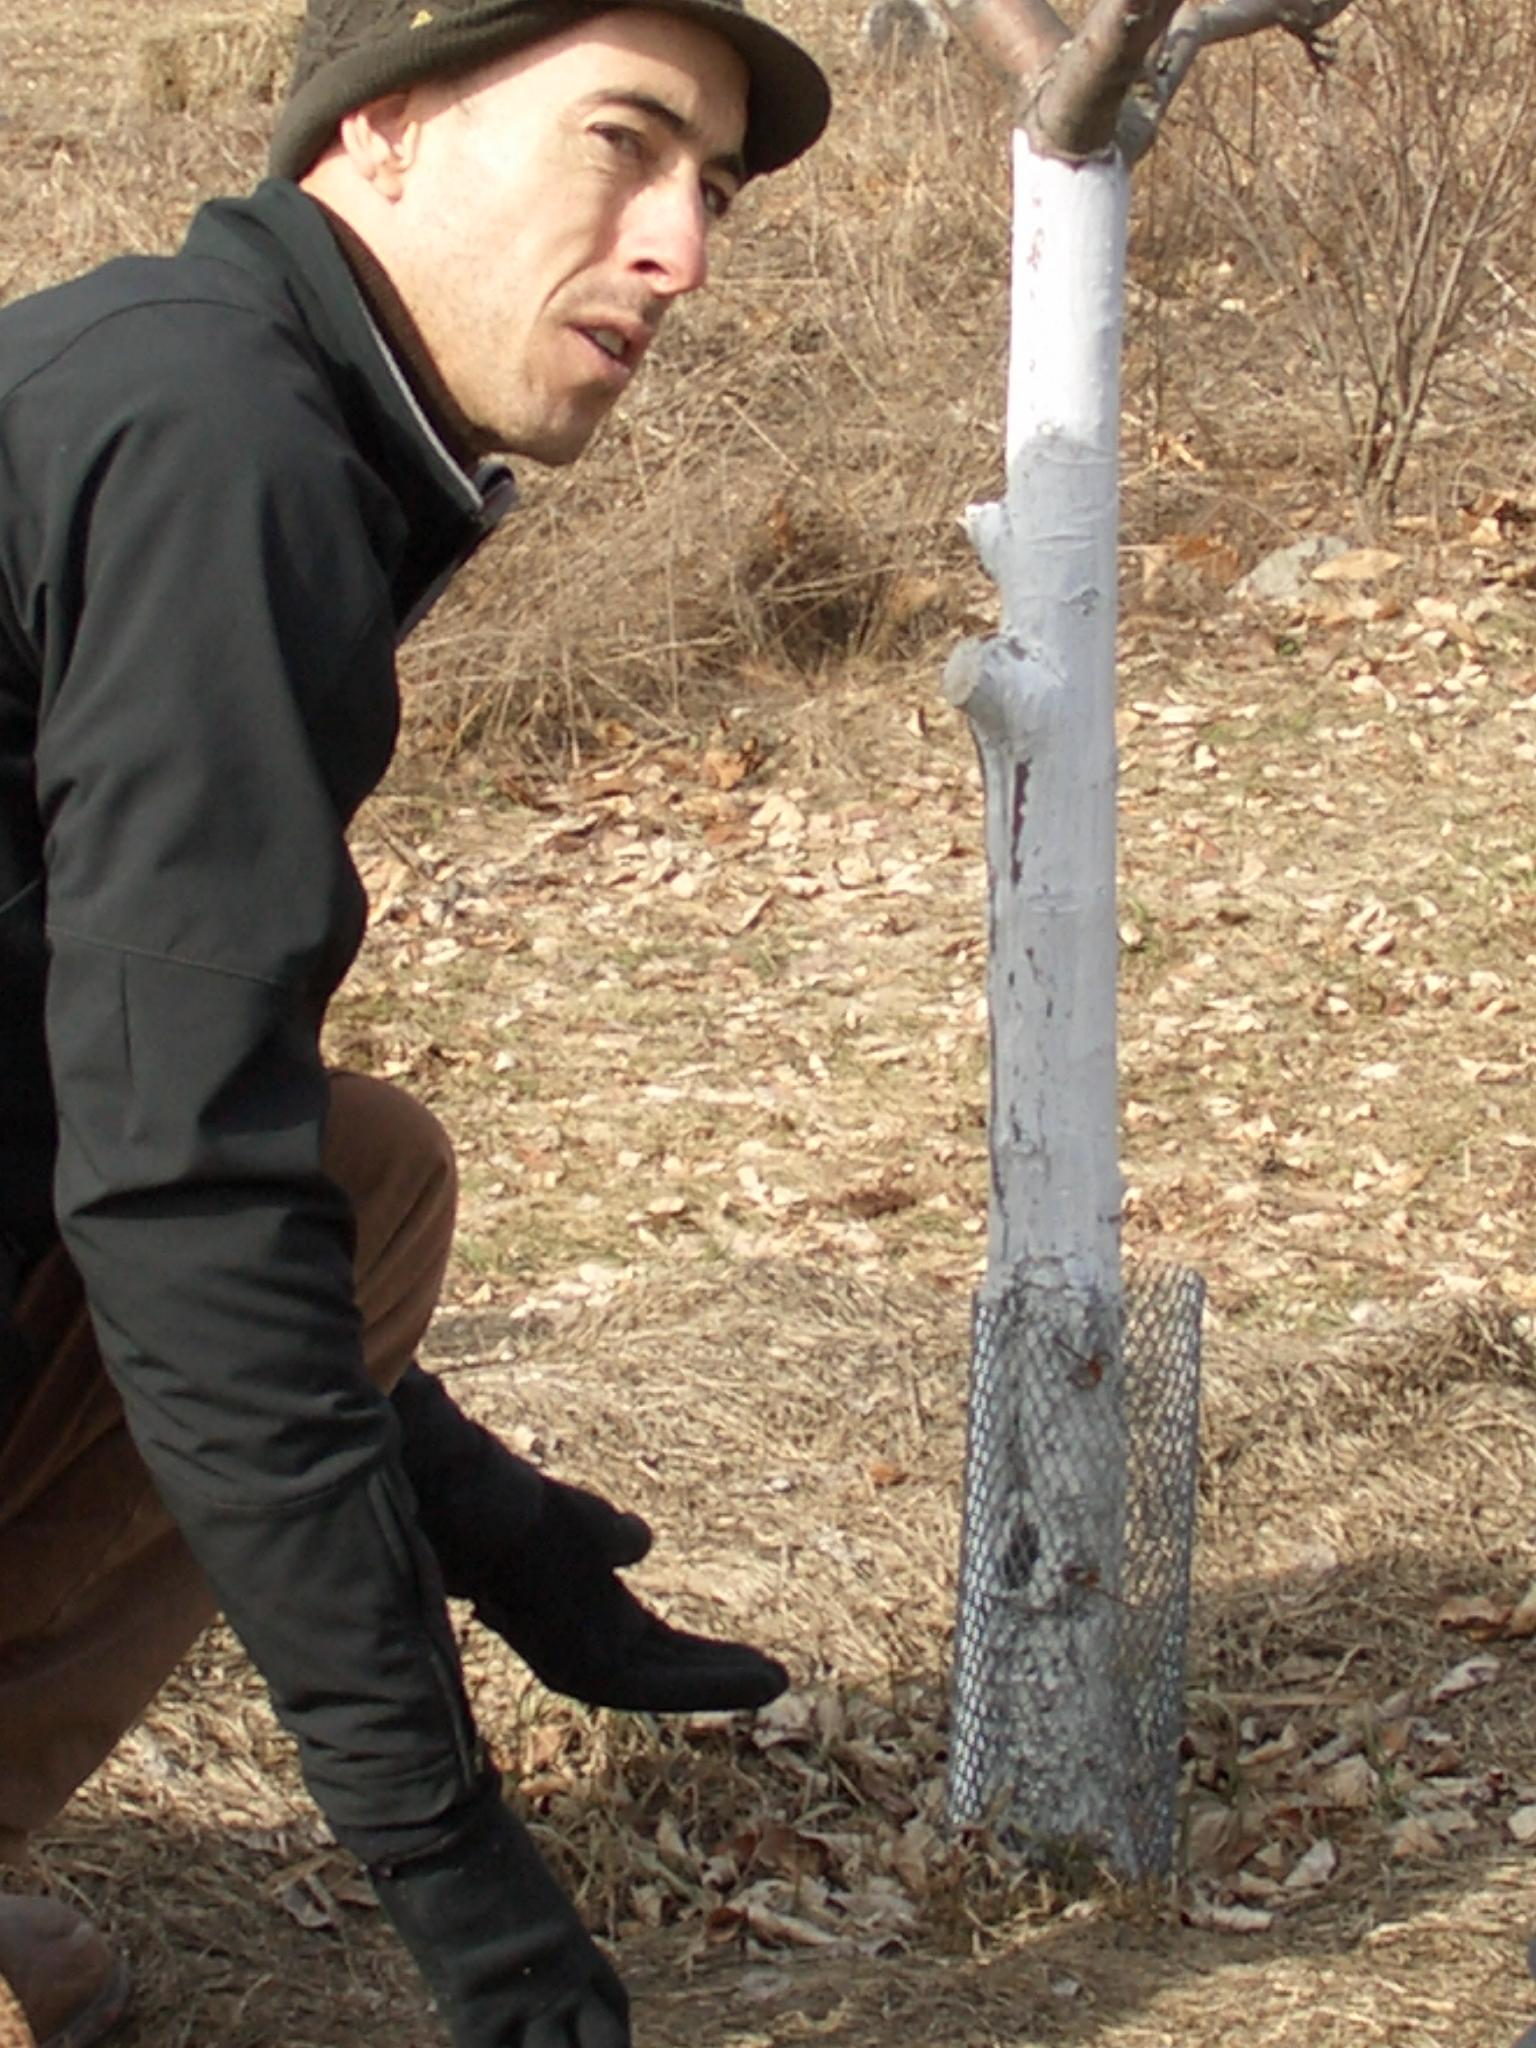
Tree paint and hardware cloth protect trees from sunburn and gnawing critters
For young trunks, regardless of whether you have pruned them or not, paint all the way up the trunk and into the main branches. This white layer helps reflect the winter sun that heats up the southwest side of a tree’s bark during the day, causing it to expand. Then, during the night, that same bark contracts when it gets cold or freezes. This expansion and contraction creates fissures along the bark, like cuts on the skin, which enlarge with age and become entryways for disease and insects. To make this mix more multifunctional, add in finely sifted compost as a microbial inoculant, dried blood meal as fertilizer and deer repellent, diatomaceous earth to help deter pest larvae, and kaolin clay to bolster the ‘sunscreen’ and smother overwintering insect eggs. For trees newly exposed from heavy pruning, paint the tops of the remaining branches exposed to the sun.
Preventing Insect Damage Using Kaolin Clay
Kaolin is a very fine powered clay used on plants to deter crawling insects. If applied early in the season, before critters like stink bugs and Japanese beetles get crawling, it is an effective protectant. By coating the leaves of plants with the fine clay as a spray you create an unwelcome surface to crawling bugs – just imagine your eye and ear openings filled with irritating clay particles, and your reproductive parts literally clogged . . . surely you’d want to boogie from such a place. By deterring many crawling insects like the curculio and codling moth from landing and laying larvae, the cycles of infestation can be broken for seasons to come, benefiting your plants in the short and long-term. Kaolin clay is just as effective on your fruit trees as on your tomatoes and ornamentals. Be sure to apply three good coats at the early stages of the season. Don’t worry about impeding sunlight and photosynthesis as the clay actually helps plants to reduce sunburn and balance light intake. Our beneficial flying allies are not negatively affected by the clay as they land and launch with ease. The best resource to learn more about Kaolin clay is Michael Phillips’ book “The Apple Grower, A Guide for the Organic Orchardist”. Kaolin is often known and sold as ‘Surround’.
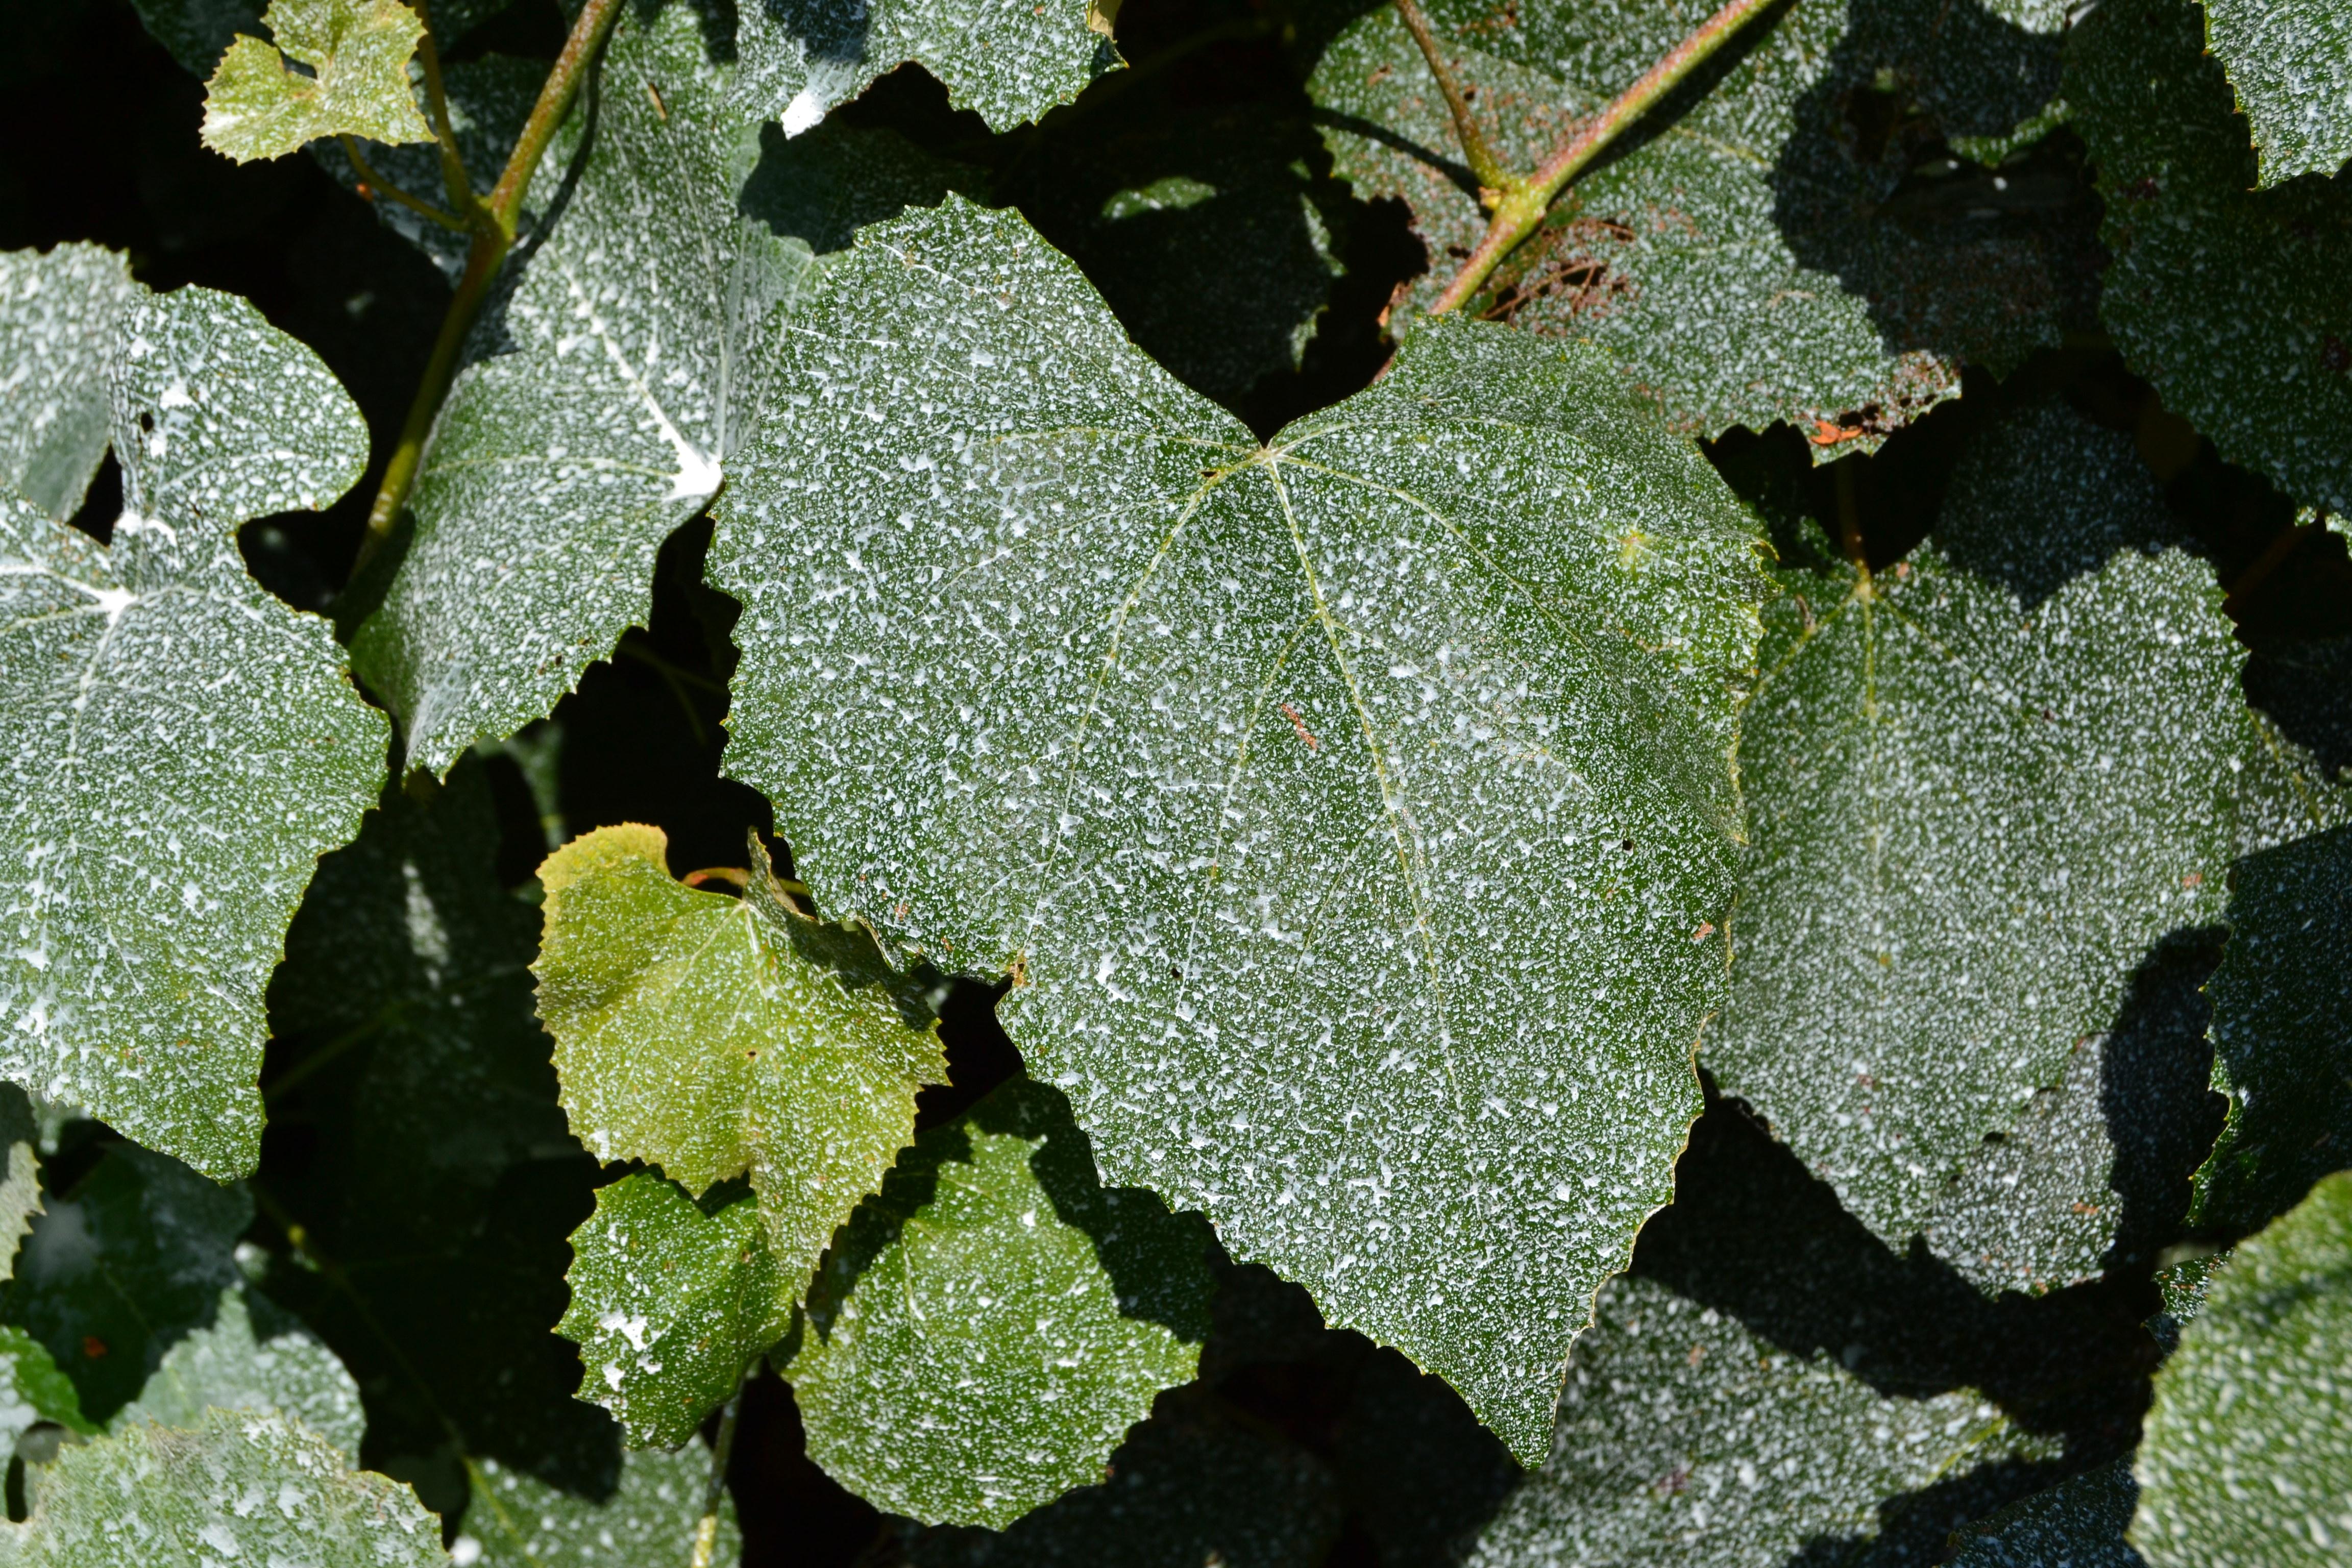
Kaolin Clay sprayed early on grape leaves to deter Japanese beetles and munching bugs
For more detailed information on fruit tree care and how to graft existing ornamental trees to become more fruitful see chapter 5 of ‘Edible Landscaping with a Permaculture Twist’.
Ecologia helps with seasonal planting, pruning and site prep. Contact us for a consultation.
Posted In: Edible and Ecological Landscape Design
Tracy Hicks
·
I have some ancient (think planted pre-1900) apple trees at our family farm that haven’t been touched with pruning equipment since the early half of that century. I have definitely been at a loss as to where to start pruning them, other than to carefully cut the dead wood off before it breaks more of the tree.