Imagine a yard where trees are dripping with fresh fruits, shrubs are bejeweled with delicious berries, gourmet mushrooms sprout in the shade, hardy kiwis fruit over an arbor … This could be your yard.
Fruit trees, bushes and vines bring the joy and flavor of fresh picked fully ripe fruit home. Whether it is one or two fruit trees or a small food forest every landscape should be graced with hanging fruit. Food Forests design helps make your foray into growing fruit at home a sure success.
A food forest is not growing food in a forest but rather like a forest. It imitates the natural ecology and pattern of healthy ecosystems where multiple species grow together intimately and symbiotically. So instead of just sticking the pear tree out in the lawn to defend itself in a sea of grass with marauding weed whackers we create an extended mulch circle that is planted with useful and beautiful perennials that support the pear. Think of it as companion planting on the perennial scale.
Benefits
There are many benefits to creating food forests.
Food forests:
- Can be squeezed into the smallest of plots
- Can be built around an existing tree
- Create a balanced ecology
- Pump out fruit, nuts, flowers, herbs
- Are simple to create and maintain
- Provide habitat, pollination, fertilizer & pest management

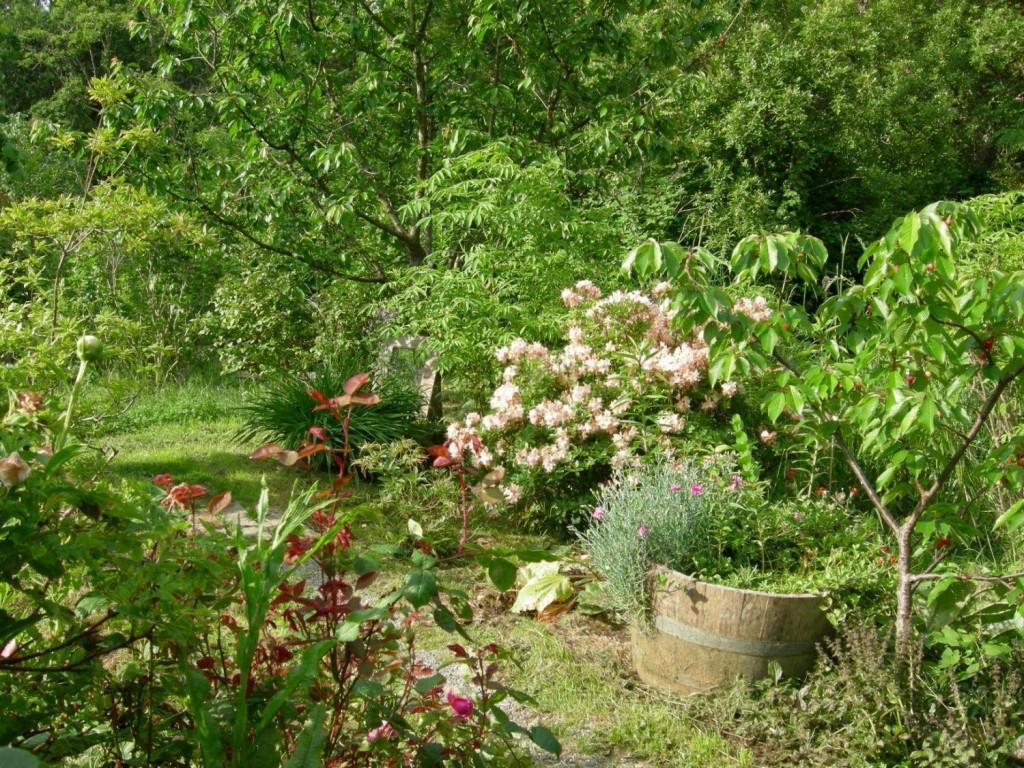
A pool side border lush with figs and purple raspberries, spiked with tea roses and towering hardy kiwi trellis
A food forest can be as small as 8 x 8 feet patch, and be as simple as your favorite small, self-fertile fruit tree well mulched and surrounded by beneficial perennials. A fruit tree oasis if you will.
The idea here is that you are designing and planting to help meet the fruit or nut tree’s needs at the beginning. Combining four or more companion plants around the fruiting tree results in higher plant production, reduced pest and disease problems, and increased soil fertility.
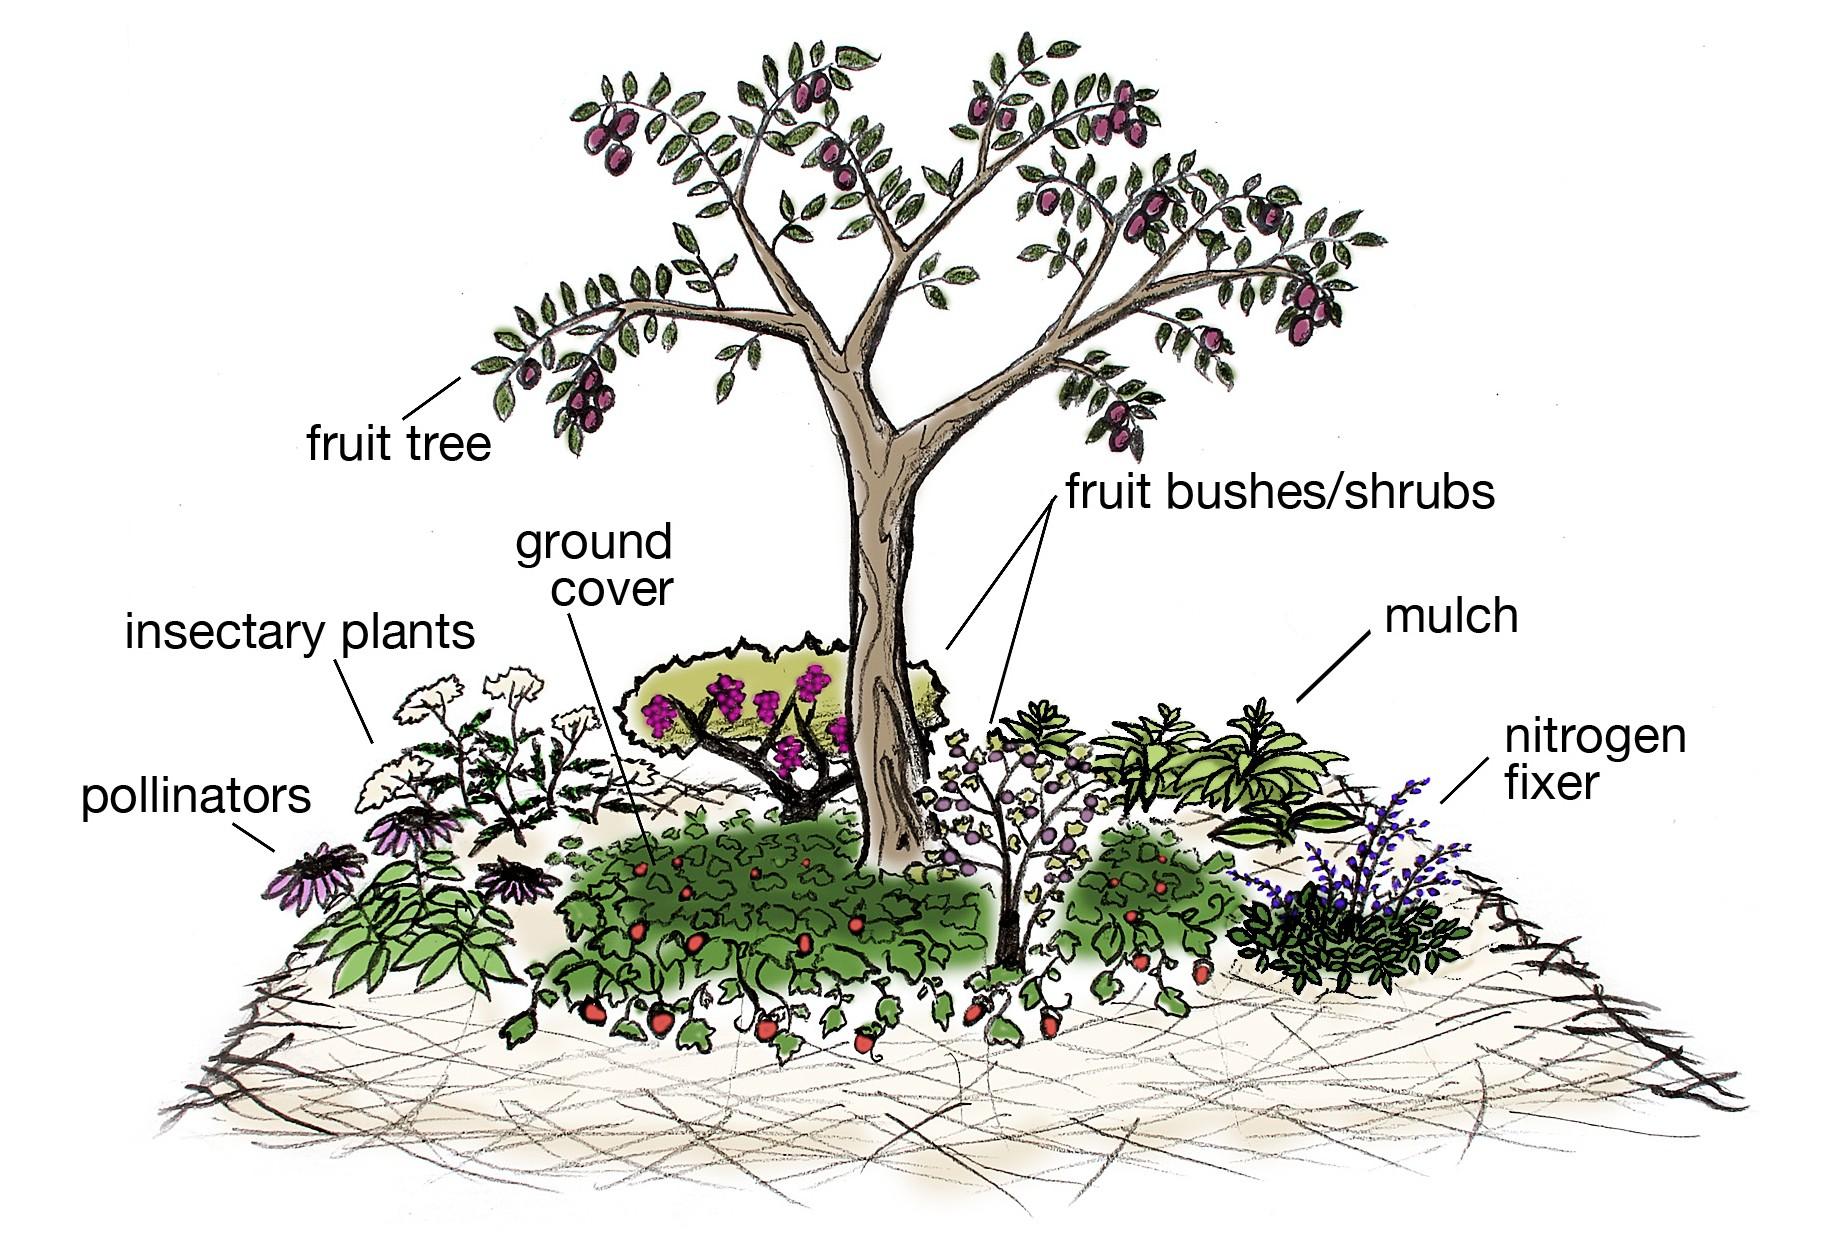
A fruit trees companions or ‘guild’ as called in permaculture help balance the trees needs, a miniature ecology
Eco-Logical
By observing how natural ecologies function, we can imitate their patterns for the things we need in a human habitat: food, fodder, fiber, medicine, and building materials. A well designed system supports itself, without much human energy and material input. This may sound dynamic and complex, which it is, but getting it started is easy.
These companions known as guilds in permaculture can be a very colorful array that adds color, texture and shape to your otherwise stagnant fruit tree planting. A few of our favorites are:
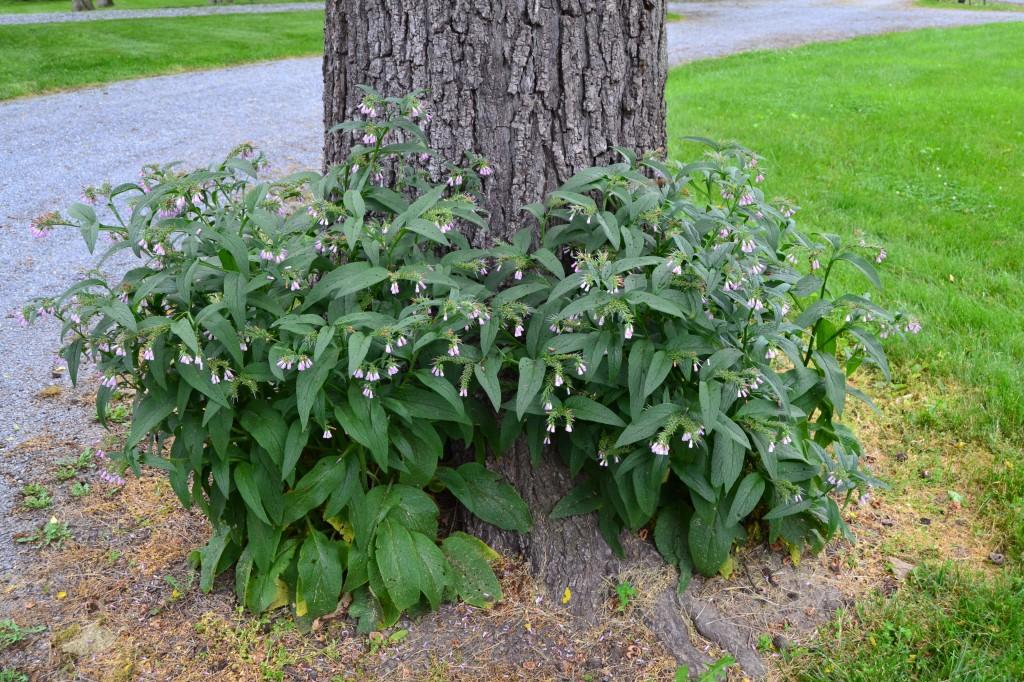
Comfrey: is planted as the mulch plant to be cut and dropped around the fruit tree throughout the growing season. Comfrey is a dynamic accumulator with a deep tap root that draws minerals and nutrients from the subsoil into its lovely, deep-green-lobed leaves. Beautiful bell shaped purple/blue flowers throughout the season also draw in pollinators.
Yarrow: as the insectary — or beneficial insect plant — yarrow has amazing architecture that all kinds of beneficial critters love to live in and pollinate from. Aside from being beautiful yarrow attracts parasitic wasps (not dangerous), lady bugs, and spiders, which help to balance pest populations. It is also a good mulch and fertilizer plant.
Echinacea: a.k.a., the pollinator, is the indigenous wonder that just won’t stop flowering. It acts like a gas station to our winged allies who stop off to fuel up, munch a bug or two, and spread the love to your fruit flowers.
Blue Wild Indigo: then there’s the wildest of the four all-stars: the blue wild indigo, the awesome nitrogen-fixer plant. She is the powerhouse of beauty and fertility as she simultaneously spikes her blue florescence into the sky and nitrogen nodules deep into the soil. Just don’t chew the seeds, or she becomes a toxic beauty.
Starting your Food Forest ‘Patch’
When setting out to plant your young fruit tree start by picking an area that ideally gets at least eight hours of direct sunlight a day. It doesn’t matter how challenging the soil is, or what’s already growing in or on it. Mark out a square 8 x 8 foot patch—or whatever shape you’d like—with flags, sticks, or you can simply eyeball it. The layer of grass, or whatever is already growing, will become your first layer in the soil-building. It is important for you to keep it, as it will add nutrients and organic matter to the upcoming soil-building sheet mulch.
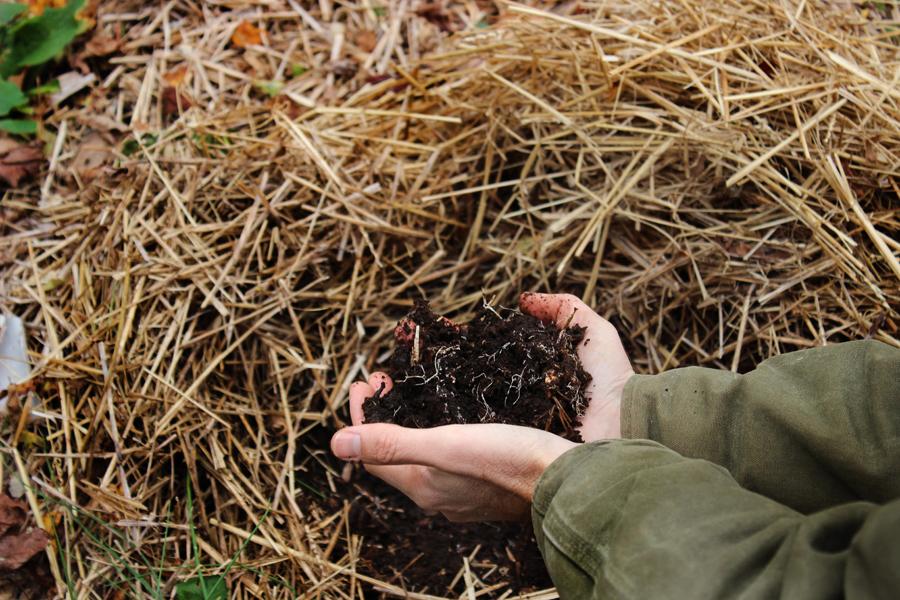
Next we begin with the easiest soil-building technique on the planet Earth: sheet-mulching. Sheet mulching is basically layering various organic materials on the ground to build up soil, hold moisture, and block out weeds. Some call it lasagna gardening and there as many recipes for the landscape as the kitchen, your site and resources will dictate your version.
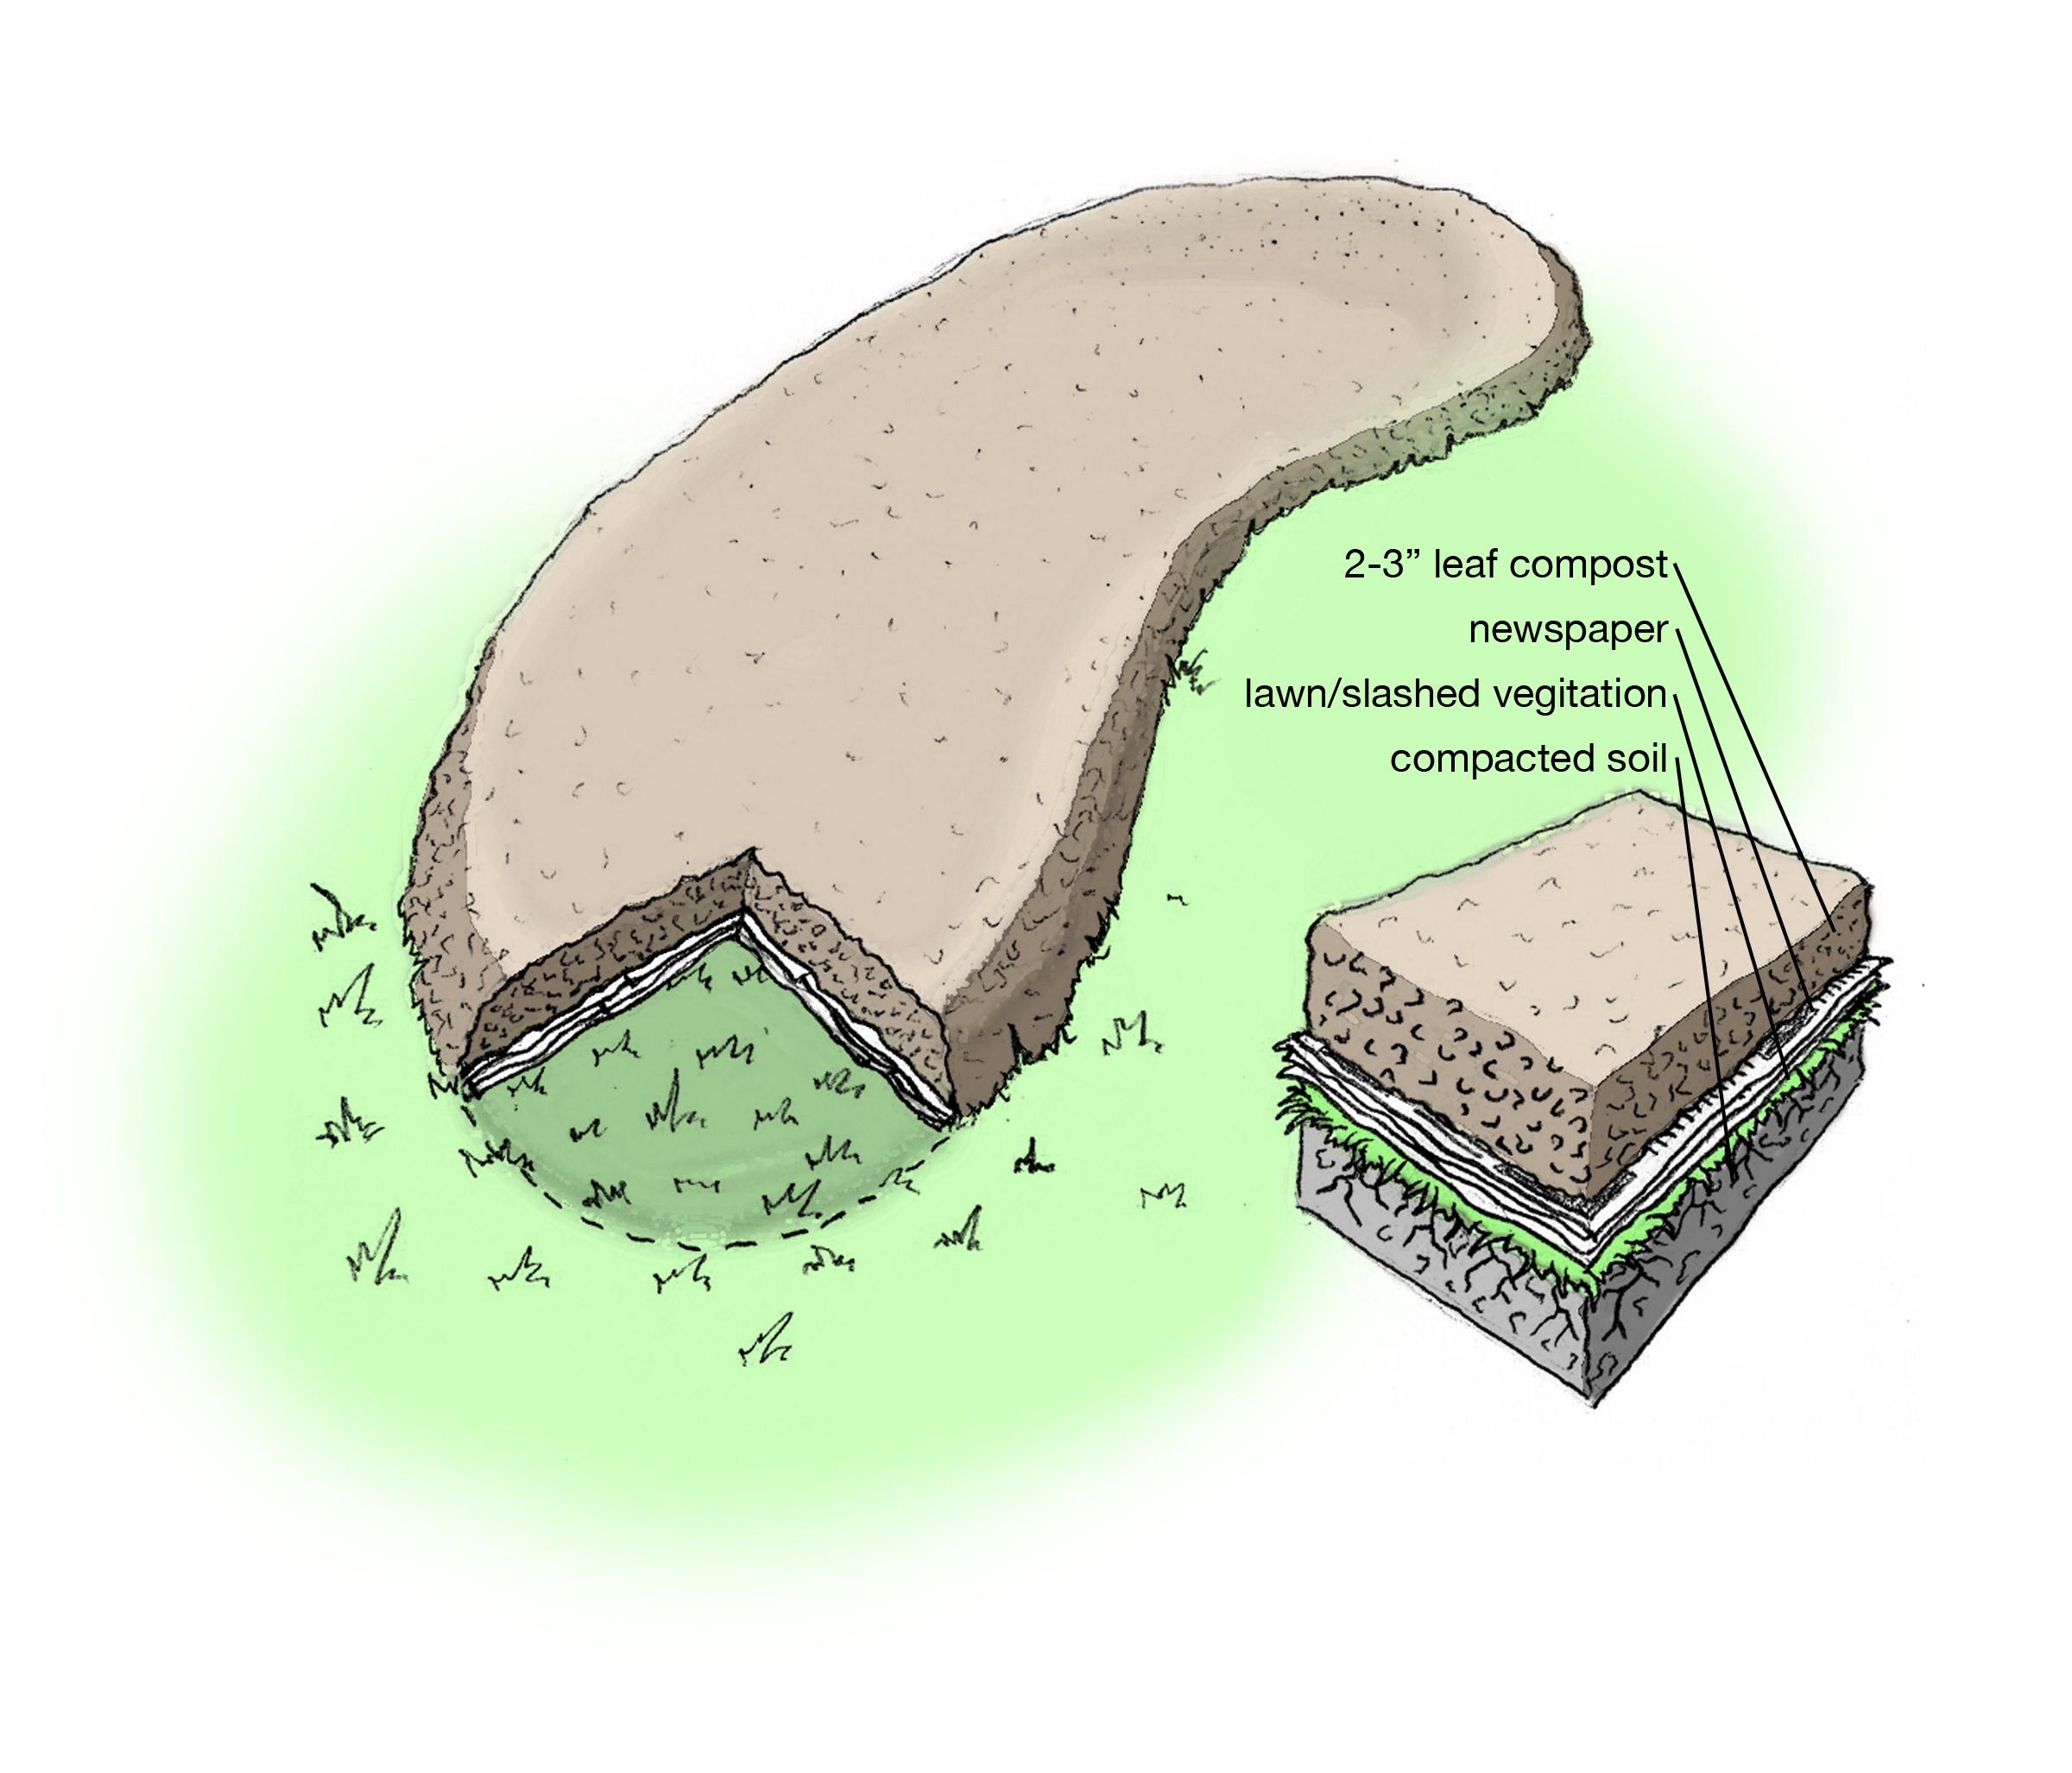
If you have municipal leaf compost it works great as a first layer. Put down two to three inches over the 8 x 8 foot square, the equivalent of about three wheelbarrows or one-third of a cubic yard. This first layer can be just about any nutrient-rich material, such as fresh manures, vegetable waste, your own compost, or shredded leaves.
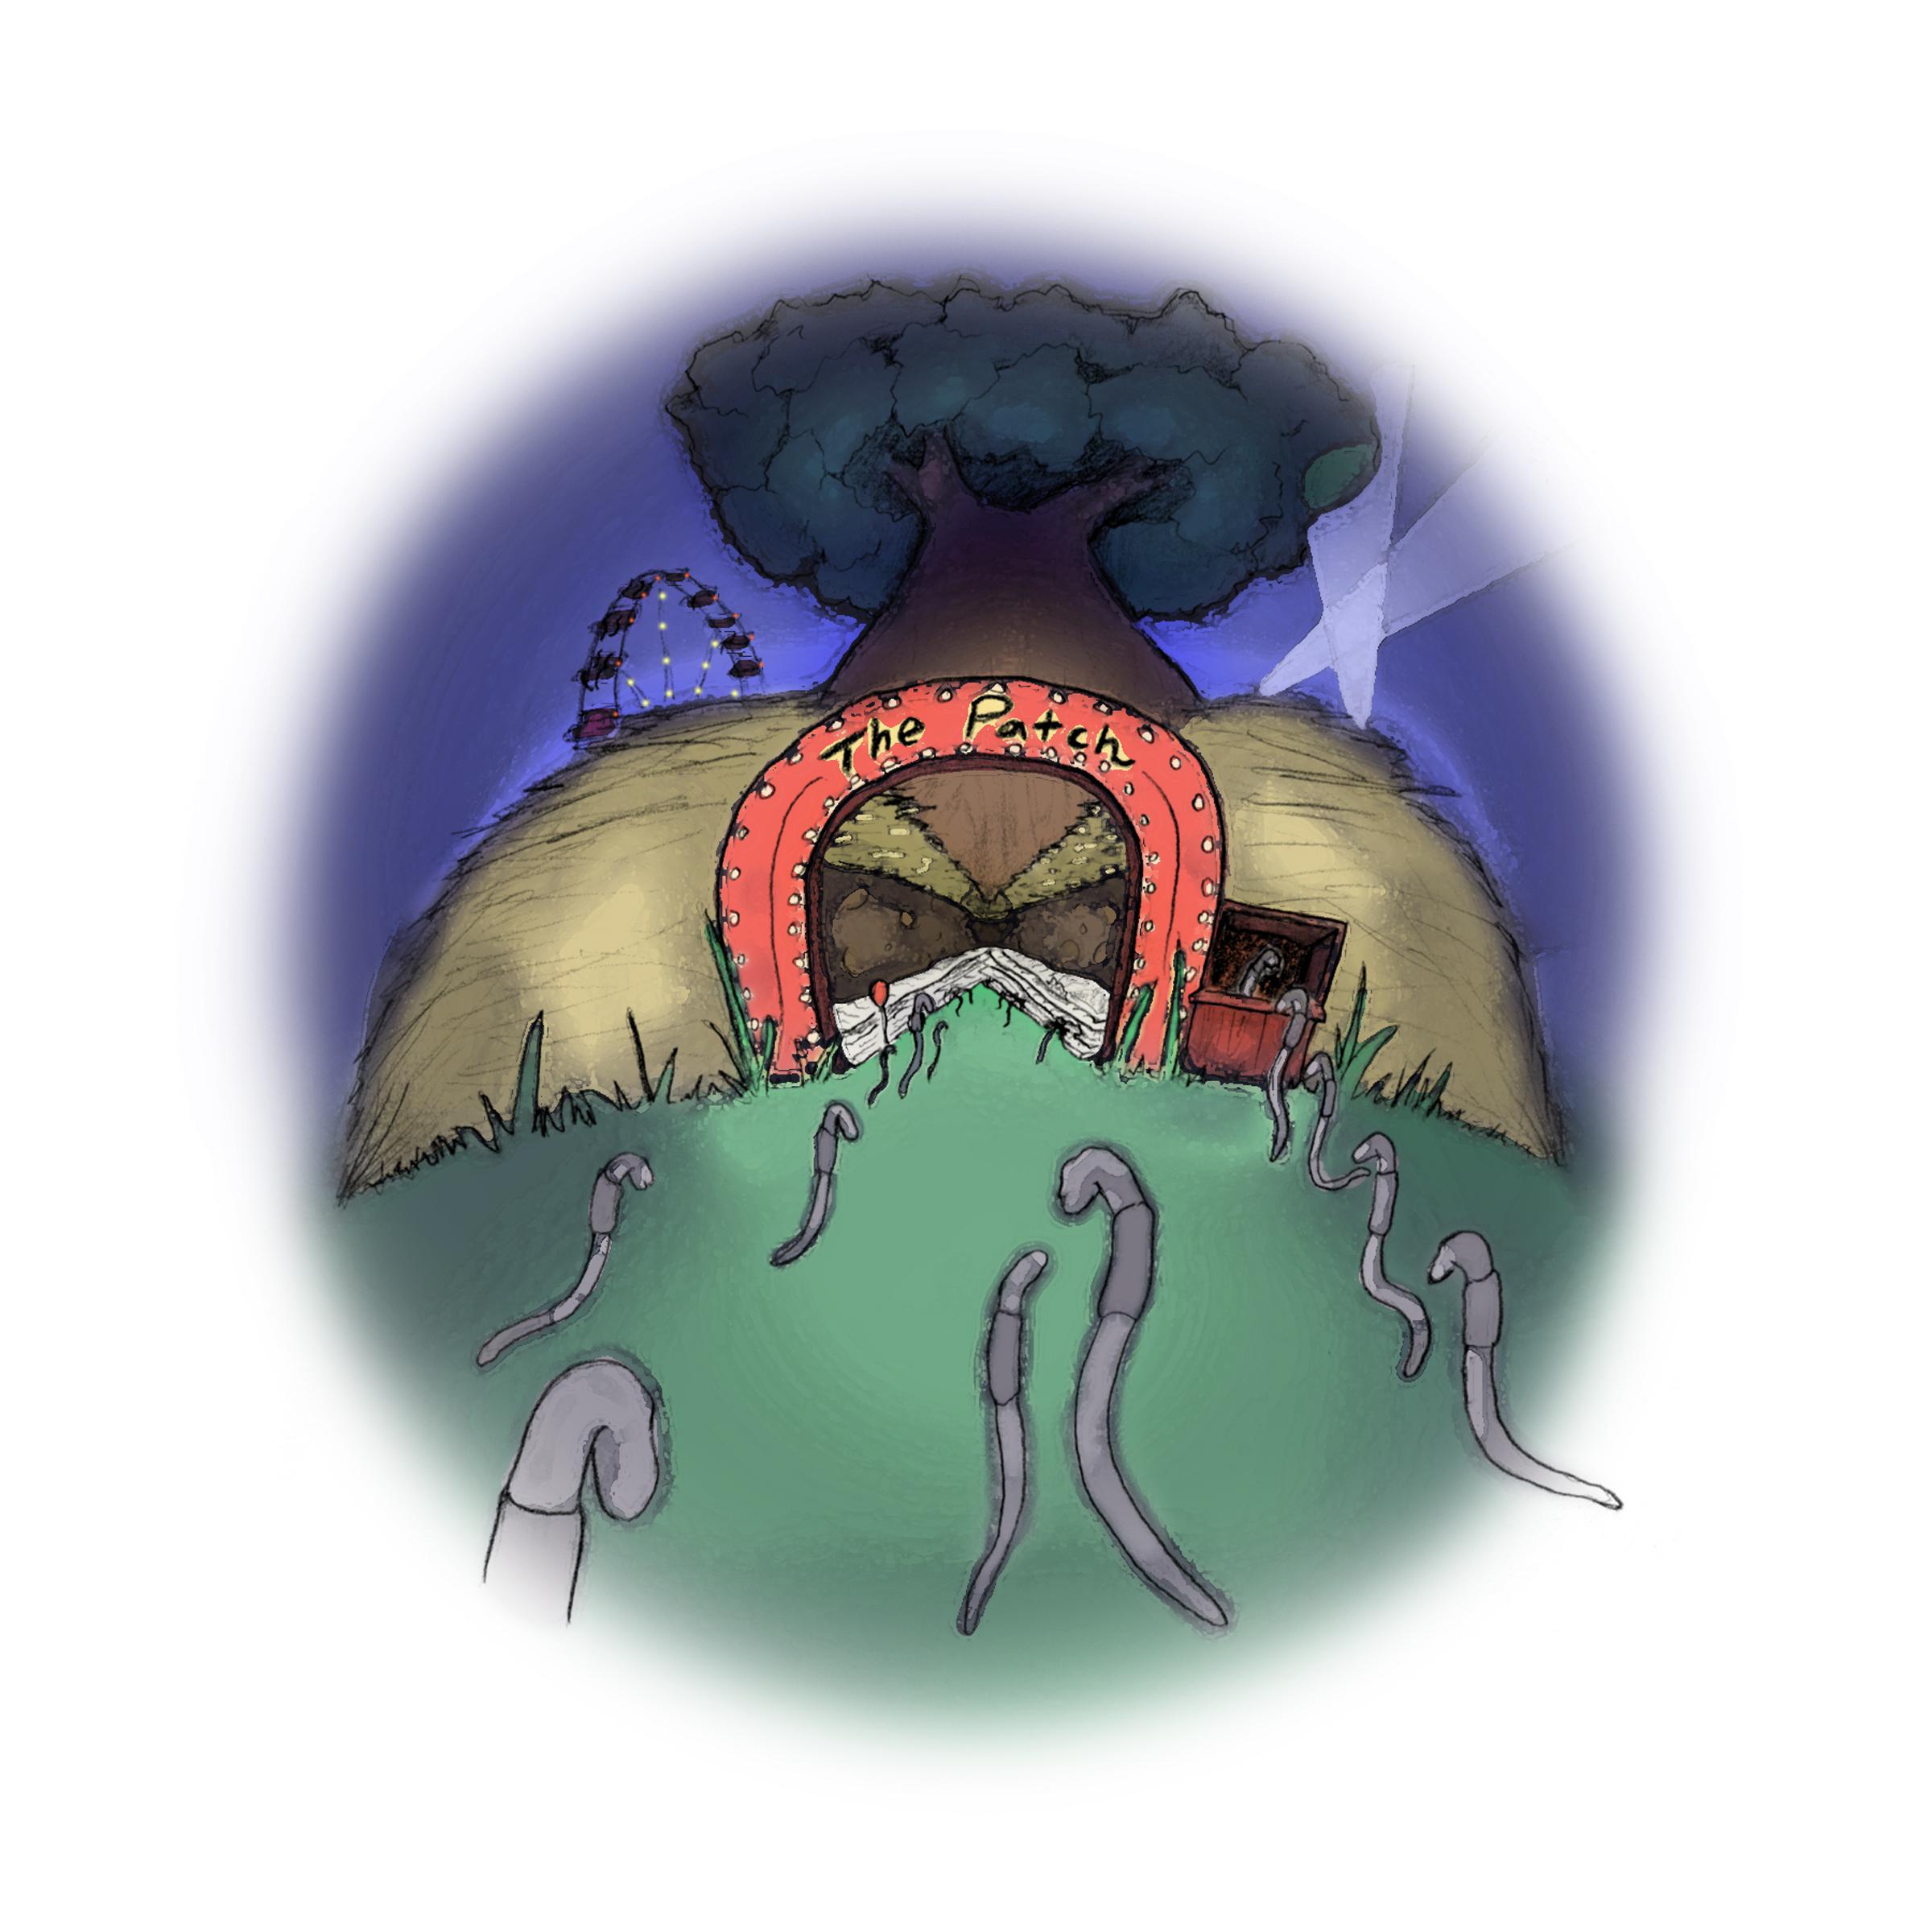
Next, you will add a layer of newspaper[1]. Take unopened sections of the black and white sections only and place them over the compost, slightly overlapping each section (ideally, each section should be about eight pages thick). If windy, be ready to wet down the paper as you lay it. Even better is paper that has been left out in the rain; it lays and stays much easier. The newspaper provides multiple functions: it helps kill off the grass or weeds beneath and minimizes regrowth, traps moisture, and brings up the worms who love the news. You’ll have worms coming from miles around once word gets out about the new editions. As the worms come up from beneath the soil to enjoy the compost and newspaper, they will be tunneling through the hard-packed earth, loosening the soil and fertilizing with their castings. All that for just chucking some compost and recycling materials on the ground!
[1] Newsprint these days is made with soy-based inks, so the worms give it the “organic” stamp of approval. Do not use the glossy inserts, as they are toxic to the soil and the worms. Use the black and white sections only.
Finish it off by covering the paper with two to three inches of leaf compost or a compost and top soil planting mix. This design is easier to shape as a circle or a kidney bean. What you top it off with is up to you and can match any aesthetic preference. I like to use straw or leaf compost, as it’s easy to apply and breaks down quickly, at the same rate the other layers do. However, mulch, wood chips, pine needles, shredded leaves, top soil will do just fine.
You can sheet-mulch your patch at any time of the year. Ideally the patch is left to decompose for at least one season in advance of planting (i.e., in the fall for spring planting, in spring for fall planting). Leaving it for a full year will yield even better results.
Notes: Where the strength of weed or grass is tough, add a cardboard layer on top of the newspaper that will act as further worm food, a moisture retainer, and weed blocker. If you’re retrofitting an existing tree with sheet
mulch, layer out to the tree’s drip line (area on the ground over which the branches extend) and leave 3 or 4 inches around the trunk)
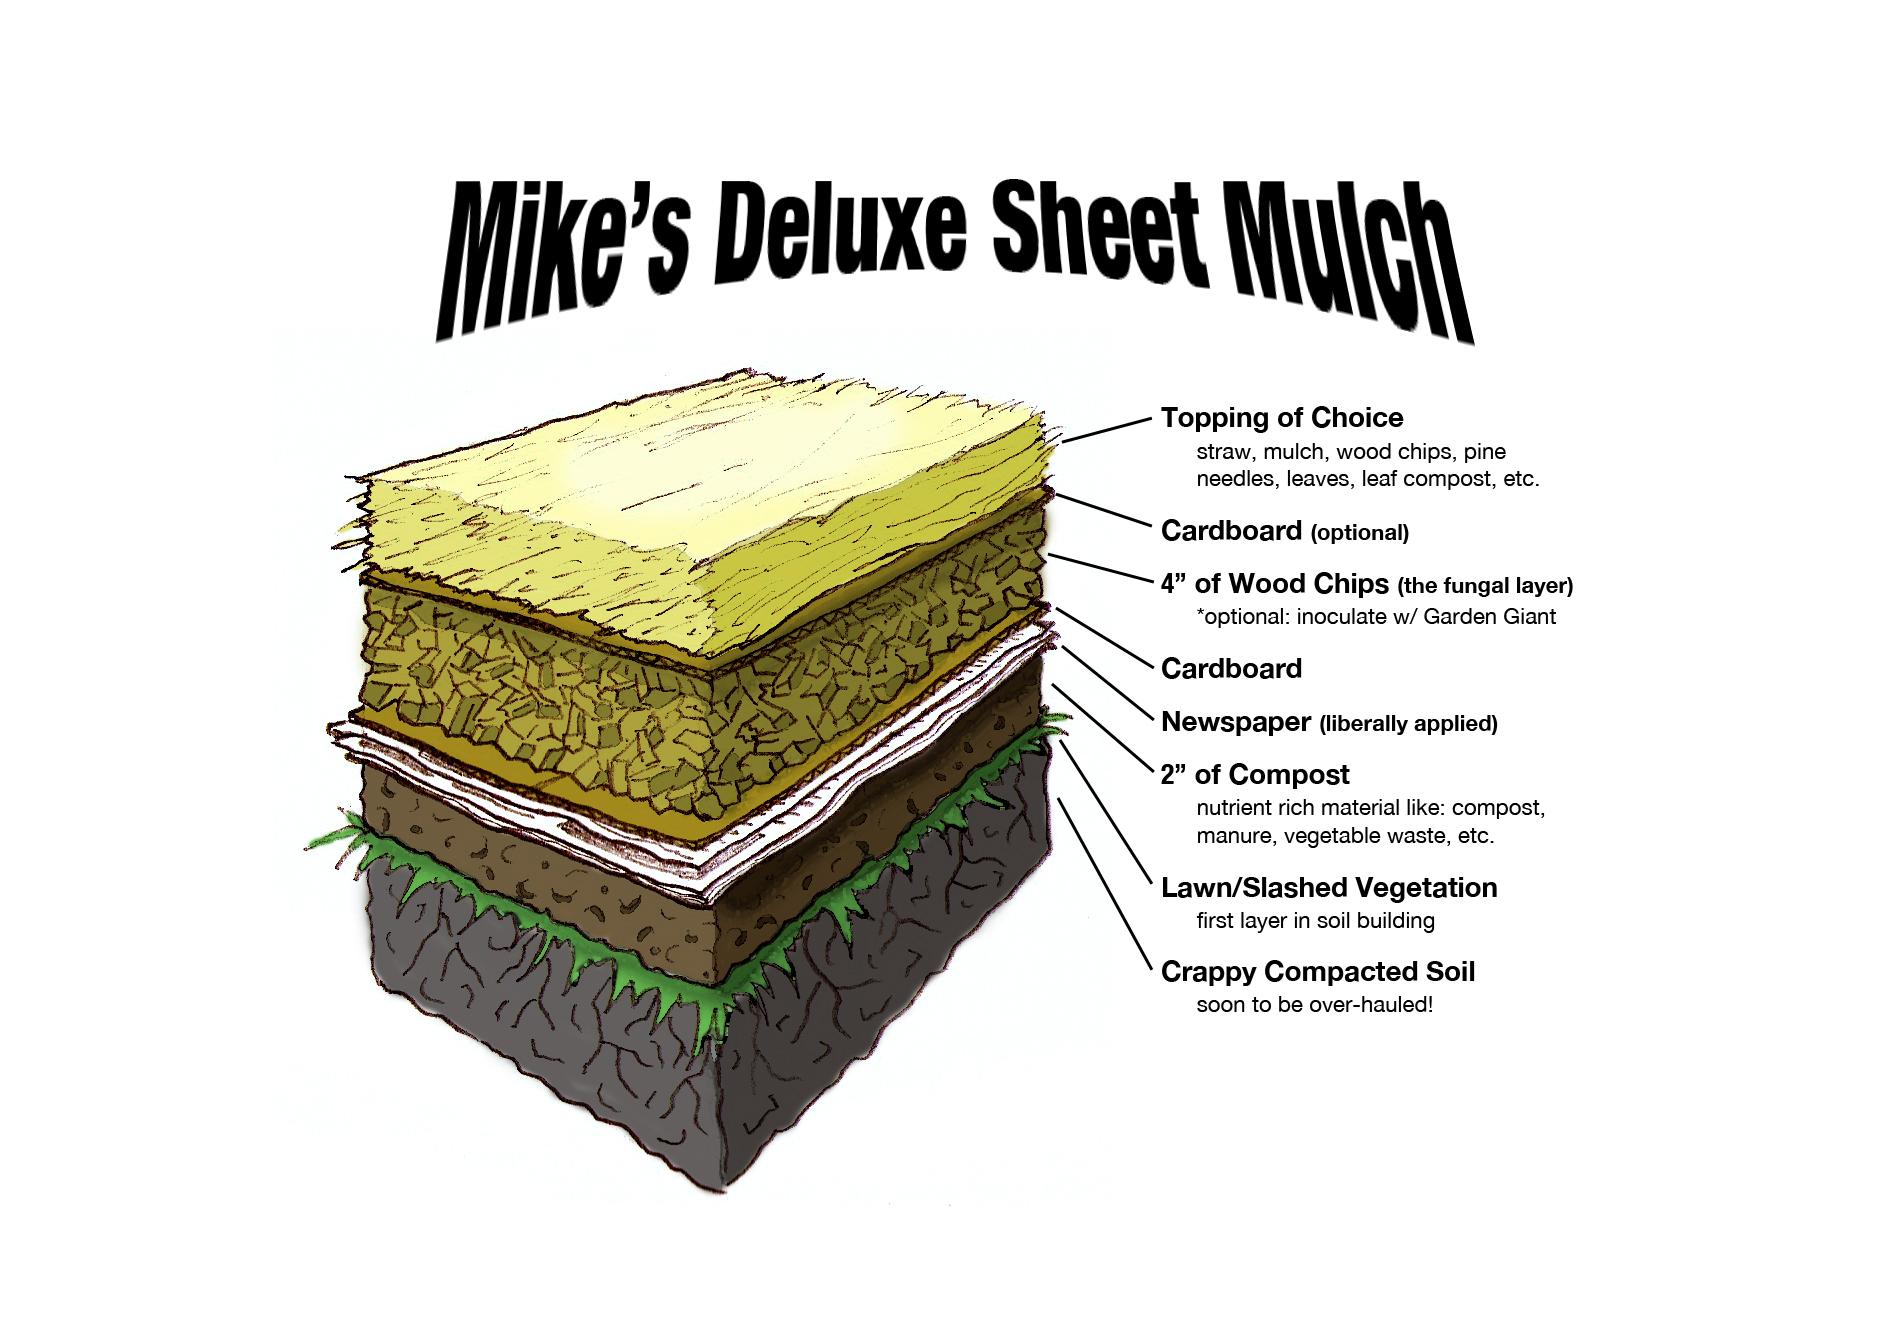
For the Hardcore Ninja Food Forest Enthusiast, I recommend Mike’s Deluxe Sheet Mulch which gives you over two years of soil-building at once. Start by following the initial directions above–chuck down your compost layer, newsprint, and cardboard. Follow by adding four inches of untreated wood chips[1] (this is called the “fungal layer”), another layer of cardboard, and your choice of topping (mulch, more wood chips, leaves, or leaf compost). If you leave out the second layer of cardboard because it is a windy site,[2] or you’re worried it will become exposed, then double up on the topping.
The added wood chips sandwiched between the cardboard will retain moisture and draw in saprophytic fungi (a.k.a., the wood munchers). As an alternative to wild fungi which will readily show up to help decompose the wood chips, you can inoculate this layer yourself using wine cap mushrooms (see Chapter 3). The compost and newspaper will feed the worms and soil biota for about a year. By then, the cardboard and wood chips are well into decomposition and continue the soil-feeding cycle and nutrient release to your plants. This makes Black Gold in just a year’s time, where only hard, barren soil was before. It really is all about the fungi!
[1] The wood chips can be of any age, though if you want to inoculate with the Garden Giant, be sure they are less than six months old and, ideally, hardwood (not pine). I get mine from a local arborist for a 12-pack of beer, as it saves him a trip to the dump. Note: Light beer doesn’t work…it’s a weak trade.
[2] For windy sites that blow away the top layers of the sheet mulch while it is still freshly laid, either lay across thick branches or crisscross with bamboo poles that are staked down at the corners. The sheet mulch will eventually hunker down as it gets rained on and begins to decompose.
For further soil building low down see chapter 4 on Food Forest design in ‘Edible Landscaping with a Permaculture Twist.’
Designing & Planting Your Food Forest
The year after I create the patch, I plant bare root trees[1] in the spring and late fall. Starting in the center of the patch, I stick my shovel into the composted Black Gold like a knife through butter. Then I plant one of my main producers – a fruit or nut tree.
There is a saying that for a five dollar tree you want a twenty dollar hole, meaning dig out a good wide hole for your new tree roots. If you are planting a bare root tree eye ball or measure the roots’ length and width when spread out. Place the bare root tree in a 5 gallon bucket of water while you dig the hole, being sure all the roots are submerged. Only dig your hole as deep as the roots’ depth but go extra wide on the width (no limit). Be sure to keep the sides of your hole vertical; it is natural to dig a bullet-shaped hole that can make the roots slope together rather than spread out into the surrounding soil. It also helps to rough up the sides of the hole with the shovel for the same reason. You will want to spread the roots out so they are completely comfortable and not cramped.
The soil mark should be on the tree where it was dug out at the nursery and that is where you want it to sit again, not lower and not higher. I often place a straight stick or piece of lumber across the hole to see where the soil line will be. Then ideally you have someone helping to hold the tree suspended in the hole at the right height while you slowly fill back in the excavated earth, otherwise hold the tree steady with one hand and fill with the other. Break up any clods and be sure to fill all gaps around the roots, really getting your fingers in there. If the tree has sunk a bit as you finish filling the hole, you can gently pull and shake to raise it to surface height. If it is set too high start again.
If your tree is potted, the same applies for the wide hole, roughed up sides, etc. If the roots are tightly bound to or around the root ball, tease them free with your fingers on the sides and bottom. This may seem dramatic but do it. It is for this reason that I prefer young bare root trees. Healthy young roots that have not been cramped or cut off will produce the healthiest and best anchored trees. Ironically folks go for the larger tree at the nursery thinking it is the healthiest and strongest, or they go for the end of year sale trees that have spent the extra season growing in the pots. These trees will look good for a few years after planting, but then most likely will begin to have stress issues and become susceptible to disease and drought.
Note that I do not recommend amending the planting hole with compost, fertilizer or added organic matter of any kind. It is best to top dress and feed down. If you have created the ‘patch,’ you are set for top dressing and mulch. Don’t worry if a little composted top soil gets down in the hole while planting, it’s all good.
With the tree firmly planted, I pull the sheet mulch back in close to, but not touching, the tree trunk. Next, I water deeply to settle any air holes. That will be the last time I have to think of watering the tree as long as I’ve gone with the deluxe sheet mulch. The patch can now trap the flow of water moving across the landscape, a lot like a big sponge, and hold it where you are planting. In essence, you are creating a place to store and capture energy!
To help control vermin intruders, I make a tube of hardware cloth[2] about a foot high, leaving a good inch of flex around the trunk. For larger vermin (deer, feral hippies, etc.), I fence with six foot wire-welded fencing.
Other favorite fruit tree companions:
- Lead plant: nitrogen fixer; deer don’t eat
- Lupine: nitrogen fixer; deer don’t prefer
- Garlic, Egyptian Walking Onion: deer don’t eat
- Horseradish: chop and drop mulch
- Rhubarb: chop and drop mulch; deer don’t eat
- Nettle: mulch; compost; tea
- Black-Eyed Susan: insectary
- Sweet Anne’s Lace: great insectary
- Rocks and wood: pile them up as habitat
Note: Ringing the patch with daffodils and aromatic herbs will help deter deer. But, if deer are a big issue, fencing or buckshot is the best solution!
[1] Bare root trees are catalog-ordered and come without soil while still dormant. It is usually the best way to get unique and affordable varieties. See favorite fruits chapter for recommended nurseries.
[2] Hardware cloth is a metal mesh screen with ¼-inch spacing.
Comfrey Poultice Recipe
The old monks used to call it knit bone and grew it in the monasteries for the bruised and broken wayward traveler. It has knitted and healed me more than a time or two, and I always have a poultice made and ready in the freezer, year round.
Scientifically, comfrey’s healing power is from allantoin – a substance that speeds the production of new cells. But there seems to much more in its magical healing abilities. Use the poultice for bruises, sprains, torn ligaments, fractured and broken bones, arthritis, sore muscles..
You will need:
- 3-4 large comfrey leaves
- ¼ Cup Water
- 1-2 Cups of flour
Chop up the comfrey leaves into inch size bits and place in a blender or food processor. Add just enough water to make a soupy paste. Scoop out into a bowl. Sprinkle on the flour a hand full at a time and mix well until you have a guacamole like thickness. Spread the poultice onto a cotton wash cloth ¼ inch thick, roll it up, and place in a zip lock bag. Freeze it until it’s needed or use right away.
Ecologia works with a cornucopia of uncommon fruit trees, bushes , vines, cane fruits, nuts, perennial vegetables and mushrooms that are selected for beauty, abundance, and easy of care. We can help design and acquire appropriate tree and companion selections to getting your food forest fruiting.
– Brigitte Fortin, Myersville, MD
Posted In: Edible and Ecological Landscape Design

